Modern applications often need to perform tasks that should not block the main HTTP request.
Sending emails, generating reports, processing uploaded files, resizing images, sending notifications, processing payments, running analytics, and synchronizing data with external services are common examples.
If your Node.js API performs all of these operations synchronously, response times increase and the application becomes difficult to scale.
A better approach is distributed job processing.
By using Redis as a fast data store and queue backend, Node.js applications can distribute background jobs across multiple worker processes or servers.
In this article, we’ll understand how distributed job processing works, how Redis fits into the architecture, how to implement it with Node.js and BullMQ, and what you need to consider when processing thousands or millions of jobs.
What Is Distributed Job Processing?
Distributed job processing means dividing background work into independent jobs and allowing multiple workers to process those jobs concurrently.
Instead of doing this:
Client
  ↓
Node.js API
  ↓
Process Everything
  ↓
Response
we can use:
                    ┌───────────────┐
                    │    Client     │
                    └───────┬───────┘
                            │
                            ▼
                    ┌───────────────┐
                    │   Node.js API │
                    └───────┬───────┘
                            │
                       Create Job
                            │
                            ▼
                    ┌───────────────┐
                    │     Redis     │
                    │     Queue     │
                    └───────┬───────┘
                            │
             ┌──────────────┼──────────────┐
             ▼              ▼              ▼
        ┌─────────┐    ┌─────────┐    ┌─────────┐
        │ Worker 1│    │ Worker 2│    │ Worker 3│
        └─────────┘    └─────────┘    └─────────┘
             │              │              │
             └──────────────┼──────────────┘
                            ▼
                     External Services
                       / Database
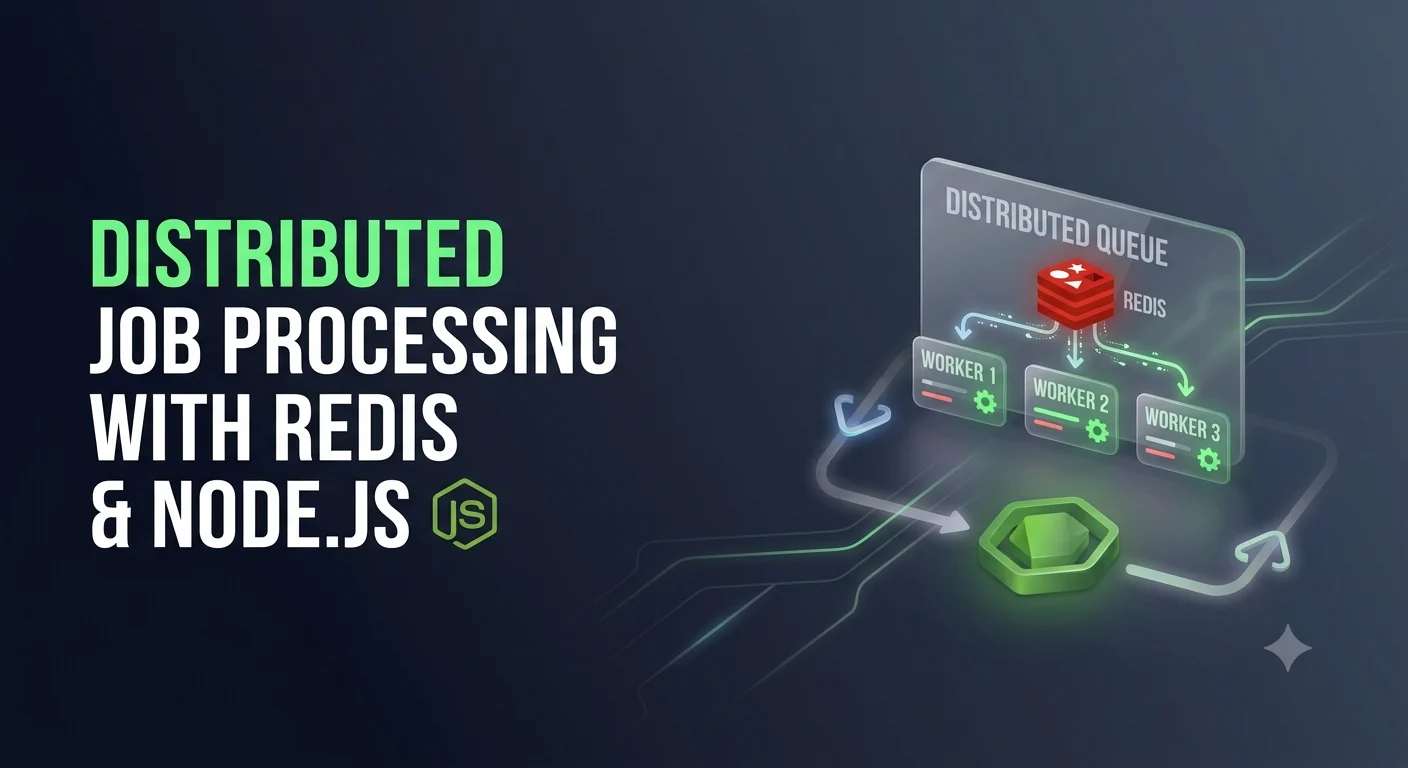
The API creates a job and places it into Redis.
Workers then pick jobs from the queue and process them independently.
This allows the API and background processing system to scale separately.
Why Use Redis for Job Processing?
Redis is an in-memory data store known for very low latency.
It provides data structures such as:
- Lists
- Sets
- Sorted sets
- Hashes
- Streams
These features make Redis useful for implementing queues and managing job state.
For Node.js applications, Redis is commonly used together with queue libraries such as BullMQ.
Redis can store information such as:
job ID
job status
job data
retry count
attempts
priority
timestamps
delayed jobs
The application doesn’t have to maintain all this queue logic manually.
Redis Queue vs Database Queue
A common question is:
Why not simply store jobs in MongoDB or PostgreSQL?
You can.
For some workloads, a database-backed queue is perfectly acceptable.
However, Redis is particularly useful when you need:
- High-throughput job processing
- Fast queue operations
- Delayed jobs
- Job prioritization
- High concurrency
- Distributed workers
- Retry management
- Temporary job state
A typical architecture can therefore look like:
Node.js API
     │
     ▼
   Redis
     │
     ├── Queue
     ├── Job State
     ├── Delayed Jobs
     └── Retry Information
            │
            ▼
        Node.js Workers
            │
            ▼
       MongoDB / APIs
Choosing a Node.js Queue Library
You could build a queue using Redis commands directly.
However, production applications usually benefit from a dedicated queue library.
Popular options include:
- BullMQ
- Bull
- Bee-Queue
- Custom Redis queues
For modern Node.js applications, BullMQ is a strong option because it provides features such as:
- Redis-backed queues
- Workers
- Delayed jobs
- Scheduled jobs
- Retries
- Backoff strategies
- Job priorities
- Concurrency
- Rate limiting
- Job events
Installing BullMQ and Redis
Create a Node.js project:
npm init -y
Install BullMQ:
npm install bullmq ioredis
For TypeScript:
npm install -D typescript ts-node @types/node
You also need a Redis server.
For local development, you can run Redis using Docker:
docker run -d \
  --name redis \
  -p 6379:6379 \
  redis
Check whether Redis is running:
docker ps
Creating a Redis Connection
Create:
src/config/redis.ts
Example:
import IORedis from "ioredis";

export const redisConnection = new IORedis({
    host: "127.0.0.1",
    port: 6379,
    maxRetriesPerRequest: null
});
The important part is that the API and workers can connect to the same Redis instance.
For production, the connection could instead point to a managed Redis service.
Creating a Job Queue
Create:
src/queues/email.queue.ts
import { Queue } from "bullmq";
import { redisConnection } from "../config/redis";

export const emailQueue = new Queue("email-queue", {
    connection: redisConnection
});
Now we have a queue called:
email-queue
Adding Jobs to the Queue
Suppose a user registers on your platform.
Instead of sending an email inside the API request:
await sendEmail(user.email);

res.json({
    status: 1,
    message: "Registration successful"
});
we can add an email job:
await emailQueue.add("send-welcome-email", {
    userId: user._id,
    email: user.email
});

res.json({
    status: 1,
    message: "Registration successful"
});
The API can return quickly.
The actual email processing happens later in a worker.
Creating a Distributed Worker
Create:
src/workers/email.worker.ts
import { Worker } from "bullmq";
import { redisConnection } from "../config/redis";

const emailWorker = new Worker(
    "email-queue",
    async (job) => {

        console.log("Processing job:", job.id);

        if (job.name === "send-welcome-email") {

            const { userId, email } = job.data;

            await sendWelcomeEmail(userId, email);
        }
    },
    {
        connection: redisConnection,
        concurrency: 10
    }
);

async function sendWelcomeEmail(
    userId: string,
    email: string
) {
    console.log(`Sending email to ${email}`);

    // Email provider API
}
The worker listens to the Redis queue and processes available jobs.
How Distributed Processing Works
Suppose you have:
10,000 jobs
and one worker can process:
10 jobs/second
A single worker would need roughly:
10,000 / 10 = 1,000 seconds
Now deploy five workers:
Worker 1 → 10 jobs/sec
Worker 2 → 10 jobs/sec
Worker 3 → 10 jobs/sec
Worker 4 → 10 jobs/sec
Worker 5 → 10 jobs/sec
Total processing capacity becomes approximately:
50 jobs/sec
The same Redis-backed queue distributes jobs among the workers.
                     Redis
                       │
          ┌────────────┼────────────┐
          ▼            ▼            ▼
       Worker 1     Worker 2     Worker 3
          │            │            │
          ▼            ▼            ▼
       Job A         Job B         Job C

          ┌────────────┬────────────┐
          ▼            ▼            ▼
       Worker 4     Worker 5     Worker 6
This is the core idea behind distributed job processing.
Worker Concurrency
There are two different ways to increase processing capacity.
Increase concurrency
A single worker process can process multiple jobs concurrently:
const worker = new Worker(
    "email-queue",
    async (job) => {
        await processJob(job);
    },
    {
        connection,
        concurrency: 20
    }
);
Increase worker instances
You can also run multiple worker processes:
Worker 1
Worker 2
Worker 3
Worker 4
Each worker can also have concurrency.
For example:
4 workers × 20 concurrency
Potentially gives:
80 concurrent jobs
But this doesn’t mean every workload will actually process 80 jobs efficiently.
Database capacity, API rate limits, CPU, memory, and network bandwidth can become bottlenecks.
Horizontal Scaling
One of the biggest advantages of distributed workers is horizontal scaling.
Instead of making one server extremely powerful:
Large Server
    │
    └── Worker
you can run multiple smaller workers:
             Redis
               │
       ┌───────┼───────┐
       ▼       ▼       ▼
    Worker   Worker   Worker
       │       │       │
       ▼       ▼       ▼
    Database / External APIs
If the queue starts growing, add more workers.
For example:
10 workers
    ↓
20 workers
    ↓
50 workers
This approach is particularly useful in cloud and containerized environments.
Automatic Scaling Based on Queue Depth
A production system shouldn’t always run 50 workers.
Instead, worker capacity can be adjusted according to workload.
For example:
Queue depth = 100
→ 2 workers

Queue depth = 10,000
→ 10 workers

Queue depth = 100,000
→ 50 workers
The exact numbers depend on the workload.
The important metric is queue depth.
If the queue keeps growing faster than workers can consume jobs, you have a processing-capacity problem.
Retry Failed Jobs
Background jobs frequently fail.
For example:
API timeout
Database unavailable
Email provider error
Network failure
Temporary authentication failure
You shouldn’t immediately lose the job.
BullMQ allows retry configuration.
await emailQueue.add(
    "send-email",
    {
        email: "user@example.com"
    },
    {
        attempts: 5,
        backoff: {
            type: "exponential",
            delay: 2000
        }
    }
);
The job can be retried multiple times.
A simplified retry pattern looks like:
Attempt 1
   ↓
Failure
   ↓
Wait
   ↓
Attempt 2
   ↓
Failure
   ↓
Wait longer
   ↓
Attempt 3
Exponential Backoff
Retrying immediately can make an outage worse.
Imagine an external API is unavailable.
If 10,000 failed jobs immediately retry:
10,000 requests
     ↓
API fails
     ↓
10,000 immediate retries
     ↓
API overloaded
     ↓
More failures
Instead, use exponential backoff:
Retry 1 → 2 seconds
Retry 2 → 4 seconds
Retry 3 → 8 seconds
Retry 4 → 16 seconds
This gives the external service time to recover.
Dead-Letter Jobs
Some jobs will fail permanently.
For example:
Invalid email
Invalid document
Deleted user
Invalid payment information
Unsupported file
Retrying these jobs forever doesn’t make sense.
After the maximum number of attempts, the job should be moved into a failed/dead-letter workflow.
Job
 ↓
Attempt 1 → Failed
 ↓
Attempt 2 → Failed
 ↓
Attempt 3 → Failed
 ↓
Dead Letter / Failed Jobs
Administrators can then inspect these jobs and decide whether they should be retried manually.
Idempotency Is Critical
Distributed systems commonly use at-least-once delivery.
This means a job may occasionally be processed more than once.
Consider a payment job:
Process Payment
If the worker completes the payment but crashes before acknowledging the job, the queue may deliver it again.
Without protection:
Payment ₹1,000
Payment ₹1,000
The user could potentially be charged twice.
The solution is idempotent processing.
For example:
const existingPayment = await PaymentModel.findOne({
    idempotencyKey: job.data.paymentId
});

if (existingPayment) {
    return;
}
Then process the payment only if it hasn’t already been completed.
Use Unique Job IDs
A useful technique is to assign meaningful job IDs.
await emailQueue.add(
    "send-email",
    {
        userId: user._id,
        email: user.email
    },
    {
        jobId: `welcome-email-${user._id}`
    }
);
This can help prevent accidental duplicate jobs.
However, job uniqueness alone isn’t enough.
Your actual business operation should also be idempotent.
Separate Queues by Workload
Avoid putting every type of task into one queue.
For example:
email-queue
image-processing-queue
notification-queue
report-queue
payment-queue
Why?
Because different workloads have different requirements.
For example:
Email jobs
→ Network intensive

Image processing
→ CPU intensive

Reports
→ CPU + database intensive

Payments
→ High reliability
A single queue can allow one workload to affect another.
Example Architecture
A larger Node.js application could use:
                         ┌───────────────┐
                         │    Clients    │
                         └───────┬───────┘
                                 │
                                 ▼
                         ┌───────────────┐
                         │ Node.js APIs  │
                         └───────┬───────┘
                                 │
                ┌────────────────┼────────────────┐
                ▼                ▼                ▼
          Email Queue      Image Queue      Report Queue
                │                │                │
                └────────────────┼────────────────┘
                                 ▼
                         ┌───────────────┐
                         │     Redis     │
                         └───────┬───────┘
                                 │
             ┌───────────────────┼───────────────────┐
             ▼                   ▼                   ▼
        Email Workers      Image Workers       Report Workers
             │                   │                   │
             ▼                   ▼                   ▼
        Email API            Storage              Database
This architecture allows each worker group to scale independently.
Monitoring Distributed Jobs
Once you have multiple workers, monitoring becomes essential.
Track metrics such as:
Queue depth
How many jobs are waiting?
Processing rate
How many jobs are completed per second?
Failure rate
What percentage of jobs fail?
Job latency
How long does a job wait before processing?
Processing duration
How long does each job take?
Retry count
How many jobs require retries?
These metrics tell you whether the system is healthy.
Logging Worker Activity
Workers should have structured logs.
For example:
console.log({
    jobId: job.id,
    jobName: job.name,
    status: "started"
});
And after completion:
console.log({
    jobId: job.id,
    jobName: job.name,
    status: "completed"
});
For production applications, use a structured logger such as Pino rather than relying on console.log.
Worker Error Handling
Always handle worker failures.
worker.on("completed", (job) => {
    console.log(`Job ${job.id} completed`);
});

worker.on("failed", (job, error) => {
    console.error(
        `Job ${job?.id} failed:`,
        error.message
    );
});
You can use these events to trigger:
- Alerts
- Monitoring dashboards
- Error tracking
- Failed-job notifications
Graceful Worker Shutdown
Workers should not be terminated while they are processing important jobs.
For example:
process.on("SIGTERM", async () => {

    console.log("Shutting down worker...");

    await worker.close();

    process.exit(0);
});
This becomes particularly important when deploying containers or restarting servers.
A graceful shutdown allows the worker to stop accepting new work and finish or safely release existing jobs.
Redis High Availability
Redis becomes a critical component of the architecture.
If Redis goes down:
API
 ↓
Redis unavailable
 ↓
Jobs cannot be queued
Therefore, production systems should consider:
- Redis replication
- Redis Sentinel
- Redis Cluster
- Managed Redis services
- Backups where appropriate
- Monitoring
- Memory limits
The exact setup depends on your reliability requirements.
Don’t Put Large Objects Directly Into Jobs
Avoid putting huge payloads into Redis.
Bad:
await queue.add("process-video", {
    videoBuffer: hugeBuffer
});
This can consume large amounts of Redis memory.
Instead:
await queue.add("process-video", {
    fileId: "65abc123",
    storageKey: "videos/user-123/video.mp4"
});
Store the actual file in object storage and put only the reference in the job.
For example:
Job
 ↓
fileId
storageKey
userId
The worker retrieves the file when processing starts.
Database Transactions and Jobs
Be careful when creating a database record and queueing a job.
Consider:
await UserModel.create(user);

await emailQueue.add("welcome-email", {
    userId: user._id
});
What happens if the database succeeds but Redis fails?
You could have:
User created
Email job missing
This is a distributed consistency problem.
For critical workflows, consider patterns such as:
- Transactional outbox
- Reliable event publishing
- Database-backed job state
- Retry mechanisms
The correct solution depends on how important the operation is.
Redis Is Not Your Business Database
Redis is excellent for:
Queues
Caching
Temporary state
Rate limiting
Job coordination
But your primary business data should generally remain in your main database.
For example:
MongoDB
→ Users
→ Orders
→ Payments
→ Appointments

Redis
→ Queue
→ Job state
→ Temporary data
→ Locks
This separation makes the architecture easier to reason about.
Handling Rate Limits
Suppose your worker processes:
1,000 jobs/second
but an external API only allows:
100 requests/second
Increasing workers will make the problem worse.
You need rate limiting.
Conceptually:
                 Redis Queue
                     │
             ┌───────┴───────┐
             ▼               ▼
          Worker           Worker
             │               │
             └───────┬───────┘
                     ▼
               Rate Limiter
                     │
                     ▼
                External API
This protects external services and prevents unnecessary failures.
Batch Processing
Sometimes processing jobs individually is inefficient.
Suppose you need to update:
100,000 database records
Doing:
1 job
1 database query
1 job
1 database query
...
can be expensive.
Batching can be much more efficient.
For MongoDB, for example:
await collection.bulkWrite([
    {
        updateOne: {
            filter: { _id: id1 },
            update: {
                $set: { processed: true }
            }
        }
    },
    {
        updateOne: {
            filter: { _id: id2 },
            update: {
                $set: { processed: true }
            }
        }
    }
]);
The correct batch size depends on your database and workload.
Project Structure
A TypeScript application could be organized like this:
src/
├── config/
│   └── redis.ts
│
├── queues/
│   ├── email.queue.ts
│   ├── image.queue.ts
│   └── report.queue.ts
│
├── workers/
│   ├── email.worker.ts
│   ├── image.worker.ts
│   └── report.worker.ts
│
├── services/
│   ├── email.service.ts
│   ├── image.service.ts
│   └── report.service.ts
│
├── controllers/
│   └── UserController.ts
│
├── models/
│   └── UserModel.ts
│
└── app.ts
Keep queue configuration separate from business logic.
This makes workers easier to test and maintain.
Production Deployment
A production deployment might look like:
                  Load Balancer
                       │
             ┌─────────┴─────────┐
             ▼                   ▼
         API Server           API Server
             │                   │
             └─────────┬─────────┘
                       ▼
                     Redis
                       │
        ┌──────────────┼──────────────┐
        ▼              ▼              ▼
     Workers        Workers        Workers
        │              │              │
        └──────────────┼──────────────┘
                       ▼
                  MongoDB / APIs
The API servers can scale independently from the workers.
For example:
API instances = 5
Email workers = 10
Image workers = 20
Report workers = 5
This is much more flexible than putting everything into the same Node.js process.
Common Mistakes
1. Creating a Worker Per Request
Avoid:
app.post("/send", async (req, res) => {

    const worker = new Worker(...);

});
Workers should be long-running processes.
2. No Retry Strategy
Temporary network failures are normal.
Always decide how failed jobs should behave.
3. Infinite Retries
Never retry indefinitely without a clear strategy.
Use:
Maximum attempts
+
Backoff
+
Dead-letter handling
4. Ignoring Idempotency
Assume that a job can potentially run more than once.
Design business operations accordingly.
5. One Queue for Everything
Separate workloads when they have different resource requirements or priorities.
6. Storing Huge Payloads in Redis
Keep job payloads small.
Store large files in object storage and pass references through the queue.
7. Scaling Workers Without Considering Dependencies
More workers don’t automatically mean more throughput.
If MongoDB or an external API is already at capacity:
More Workers
     ↓
More Requests
     ↓
Database Overload
     ↓
More Failures
Scale according to the entire system.
Distributed Processing vs Worker Threads
These concepts are sometimes confused.
Worker Threads
Node.js worker threads are useful for CPU-intensive operations inside a machine.
For example:
Image calculation
Large mathematical operation
CPU-heavy transformation
Distributed Workers
Distributed job processing is about running work across multiple processes or machines.
Server 1 → Worker
Server 2 → Worker
Server 3 → Worker
You can even combine both approaches.
For example:
Redis Queue
     ↓
Node.js Worker
     ↓
Worker Thread
     ↓
CPU-intensive processing
When Should You Use Distributed Job Processing?
It is especially useful when your application has:
- Large numbers of background tasks
- Long-running operations
- Unpredictable workload
- External API integrations
- Email/notification systems
- File processing
- Report generation
- Data synchronization
- Video/image processing
- Scheduled tasks
- High-volume event processing
For a small application with only a few background operations, a simpler queue may be enough.
Don’t introduce distributed infrastructure before you actually need it.
A Practical Scaling Strategy
Don’t start with dozens of workers.
A better progression is:
Stage 1
Node.js API
    ↓
Redis
    ↓
1 Worker
Stage 2
Node.js API
    ↓
Redis
    ↓
Multiple Workers
Stage 3
Node.js API
    ↓
Redis
    ↓
Auto-scaled Workers
Stage 4
Multiple APIs
      ↓
High Availability Redis
      ↓
Multiple Worker Pools
      ↓
Monitoring + Autoscaling
      ↓
Database + External Services
Scale only when your workload requires it.
Best Practices Checklist
Before deploying a distributed job-processing system, make sure you have:
- Redis configured properly
- Separate queues for major workloads
- Dedicated worker processes
- Concurrency limits
- Retry policies
- Exponential backoff
- Dead-letter/failed-job handling
- Idempotent job processing
- Job IDs
- Rate limiting
- Queue-depth monitoring
- Worker error logging
- Graceful shutdown
- Small job payloads
- Database capacity planning
- Redis monitoring
- Alerting
- Horizontal scaling strategy
Final Thoughts
Distributed job processing allows Node.js applications to move expensive or time-consuming operations outside the request-response lifecycle.
Redis provides a fast coordination layer, while libraries such as BullMQ make queue management, retries, scheduling, concurrency, and worker processing much easier.
A production architecture can therefore look like:
                 Node.js API
                      │
                      ▼
                  Redis Queue
                      │
       ┌──────────────┼──────────────┐
       ▼              ▼              ▼
    Worker 1       Worker 2       Worker 3
       │              │              │
       └──────────────┼──────────────┘
                      ▼
              Database / APIs
The most important lesson is that distributed job processing is not simply about adding Redis and more workers.
You also need to think about:
Reliability
Scalability
Idempotency
Retries
Backpressure
Rate Limits
Observability
Database Capacity
Once these pieces are designed correctly, Redis and Node.js can provide a powerful foundation for processing large volumes of background work reliably and efficiently.