Next.js is a popular React framework for building modern, fast, and scalable web applications. It provides features such as server-side rendering, static site generation, dynamic routing, API routes, image optimization, and built-in performance improvements.
Once a Next.js application is ready for production, it needs a reliable hosting environment where it can run efficiently and securely. Amazon Web Services (AWS) provides several options for hosting Next.js applications, and Amazon EC2 is a flexible choice when developers need direct control over the server.
In this guide, we will explore how to deploy a Next.js website on AWS using Amazon EC2, Node.js, PM2, and Nginx. We will also cover domain configuration, HTTPS, environment variables, deployment updates, and common deployment issues.
What Is Next.js?
Next.js is a React framework designed for building production-ready web applications.
It extends React with features that simplify application development and improve performance.
Some of the major features of Next.js include:
- Server-side rendering (SSR)
- Static site generation (SSG)
- Client-side rendering
- Dynamic routing
- API routes
- Image optimization
- Middleware
- Automatic code splitting
- SEO-friendly rendering
- Performance optimization
Next.js can be used to build business websites, SaaS platforms, eCommerce applications, blogs, dashboards, portals, and complex web applications.
Why Deploy Next.js on AWS?
AWS provides flexible infrastructure for hosting and scaling Next.js applications.
Scalability
EC2 resources can be upgraded as application traffic increases. Larger applications can also use load balancers and multiple EC2 instances.
Server Control
EC2 provides control over the operating system, Node.js environment, Nginx configuration, application files, and deployment process.
Security
AWS provides security groups, IAM, networking controls, monitoring, and other services that can help protect your infrastructure.
Flexibility
A Next.js application hosted on EC2 can be connected to databases, APIs, storage services, CDNs, and other AWS resources.
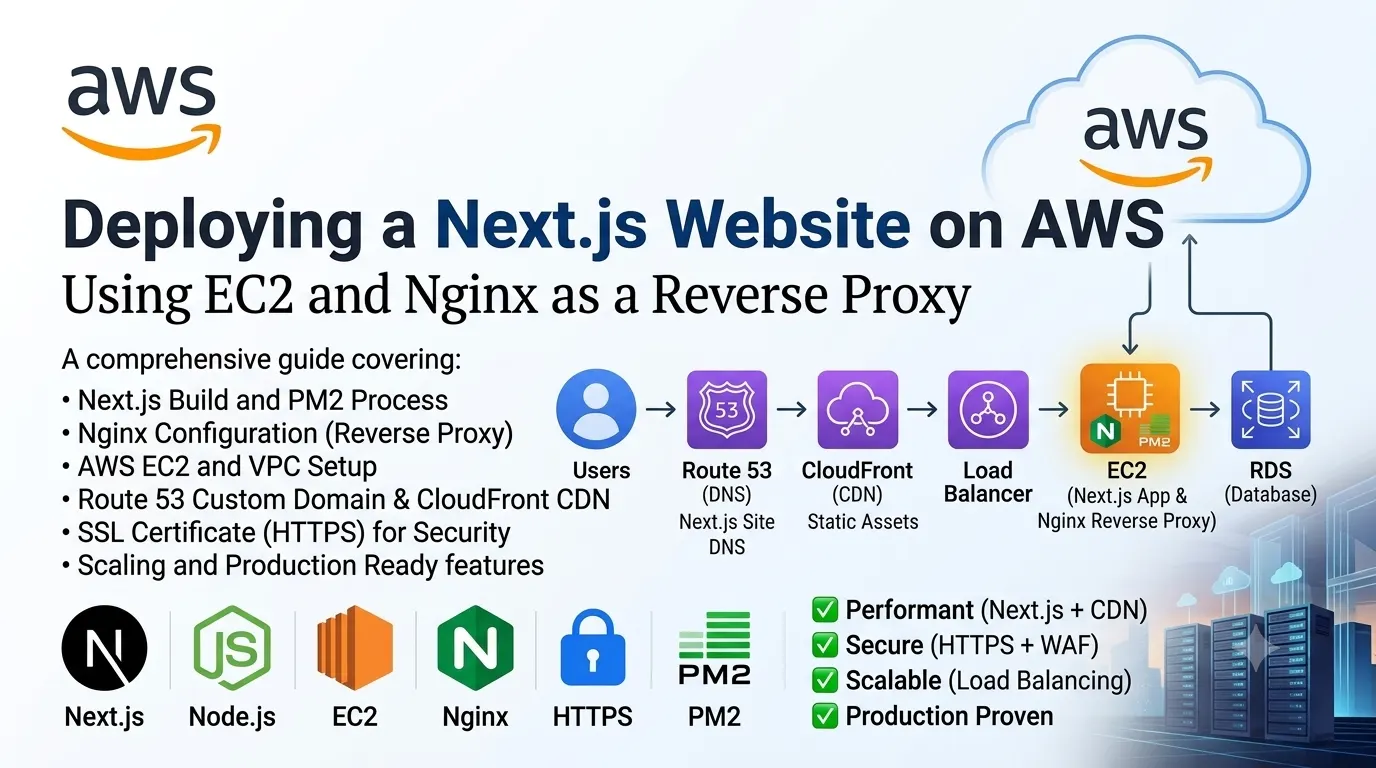
Next.js Deployment Architecture on AWS
A typical EC2 deployment can use the following architecture:
User → Nginx → PM2 → Next.js → Database/API
Each component has a different responsibility.
Nginx acts as a reverse proxy and receives requests from users.
PM2 manages the Next.js Node.js process and helps keep the application running.
Next.js handles rendering, routing, application logic, and frontend functionality.
Database/API provides persistent data and backend functionality when required.
For larger applications, this architecture can be expanded using AWS services such as Amazon RDS, Amazon S3, CloudFront, Elastic Load Balancing, and Auto Scaling.
Prerequisites
Before deploying your Next.js application, you should have:
- A Next.js application
- An AWS account
- An EC2 instance
- A Git repository containing the project
- Basic Linux command-line knowledge
- A compatible Node.js version
- npm, Yarn, or pnpm
- A domain name, if required
You should also make sure that sensitive credentials are not committed to your Git repository.
Step 1: Create an AWS EC2 Instance
The first step is to create an EC2 instance.
Log in to the AWS Management Console and open the EC2 service.
Create a new instance and select a Linux-based operating system such as Ubuntu Server.
Choose an instance type based on your application’s requirements.
For a small website, a basic instance may be sufficient. Applications with high traffic, server-side rendering, or heavy processing may require additional CPU and memory.
During the instance setup, configure a security group to allow the required traffic.
For a typical web application, you may need:
- SSH — Port 22
- HTTP — Port 80
- HTTPS — Port 443
Avoid opening unnecessary ports because publicly accessible services can increase security risks.
Once the EC2 instance is created, connect to it using SSH.
Step 2: Update the EC2 Server
After connecting to the server, update the operating system packages.
Keeping the server updated is important for security, stability, and compatibility.
Next, install the software required to run your Next.js application.
The typical production environment requires:
- Node.js
- npm
- Git
- Nginx
- PM2
The exact Node.js version should be compatible with your Next.js version and project dependencies.
Step 3: Install Node.js and npm
Next.js requires Node.js to run.
Install a supported Node.js version on your EC2 instance and verify that both Node.js and npm are working correctly.
It is recommended to use a Node.js version that is supported by your Next.js version and project dependencies.
If you manage multiple applications, a Node.js version manager can make switching between Node.js versions easier.
Step 4: Clone the Next.js Project
Once the server environment is ready, clone your Next.js project from your Git repository.
Move into the project directory and install the required dependencies.
The package manager depends on your project configuration.
For example, your project may use:
- npm
- Yarn
- pnpm
Make sure the dependencies are installed successfully before creating the production build.
Step 5: Configure Environment Variables
Next.js applications commonly use environment variables for configuration.
These variables may contain:
- API URLs
- Authentication configuration
- Database configuration
- Application settings
- Third-party service configuration
Production and development environments may require different values.
Configure the appropriate production environment variables on the EC2 server before creating the production build.
Protect Sensitive Information
Be careful when using variables with the NEXT_PUBLIC_ prefix.
These variables can be exposed to the browser and should never contain private credentials, passwords, database credentials, or secret API keys.
Sensitive configuration should remain on the server side.
Step 6: Create a Production Build
A development server is intended for local development and should not normally be used to serve a production application.
Instead, create a production build of your Next.js application.
The build process optimizes your application and prepares it to run in a production environment.
Depending on your Next.js configuration, the production output can contain server-side application code along with static assets.
After the build completes successfully, the application can be started using the production start command.
Step 7: Install and Configure PM2
PM2 is a process manager commonly used to run Node.js applications in production.
It helps keep your Next.js application running and provides features such as:
- Process management
- Automatic application restarts
- Application logs
- Startup configuration
- Process monitoring
Without a process manager, you would need to manually restart your Next.js application whenever the server restarts or the application process stops.
PM2 can be configured to automatically start your application when the EC2 instance reboots.
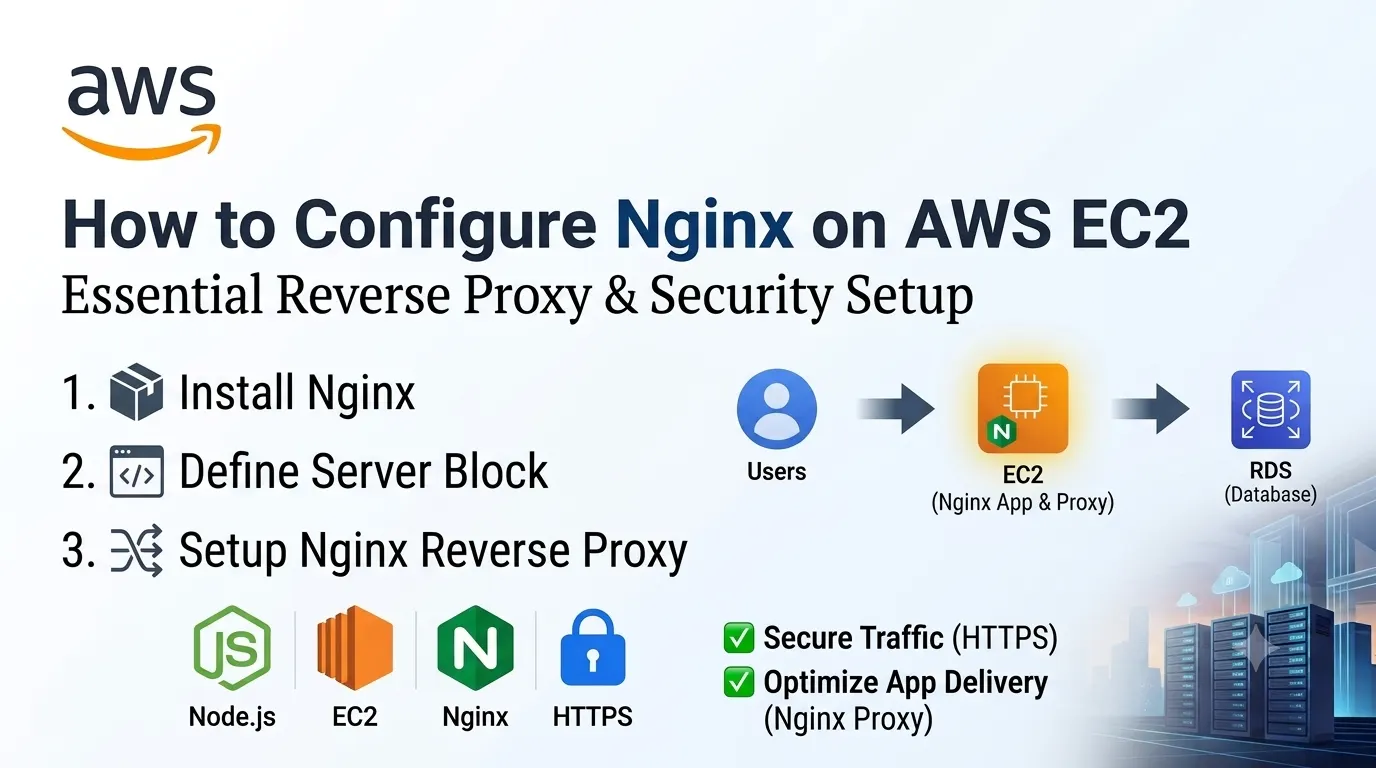
Step 8: Configure Nginx
Nginx acts as a reverse proxy between visitors and your Next.js application.
Instead of exposing the Next.js server directly to the internet, Nginx receives incoming requests and forwards them to the local Next.js process.
The request flow becomes:
Browser → Nginx → Next.js
For example, Next.js may run internally on a local application port while Nginx listens for public HTTP and HTTPS requests.
Nginx can also handle:
- HTTPS
- Domain routing
- Static files
- Request forwarding
- HTTP-to-HTTPS redirects
- Compression
- Caching
This provides a more professional production architecture.
Step 9: Configure Next.js Client-Side Routing
Next.js supports multiple types of routing, including dynamic and nested routes.
Unlike a simple static website, Next.js may need the Node.js application to process requests.
When using a standard Next.js server deployment, Nginx should forward requests to the Next.js server rather than treating every route as a static file.
This is particularly important for applications using:
- Dynamic routes
- Server-side rendering
- Middleware
- API routes
- Server components
The Nginx configuration should therefore be designed around the deployment mode used by your Next.js application.
Step 10: Configure File Permissions
Make sure that the application files have appropriate ownership and permissions.
The Nginx and Node.js processes should have access to the files they need.
Avoid giving unnecessary write permissions to the entire project directory.
Following the principle of least privilege helps reduce security risks.
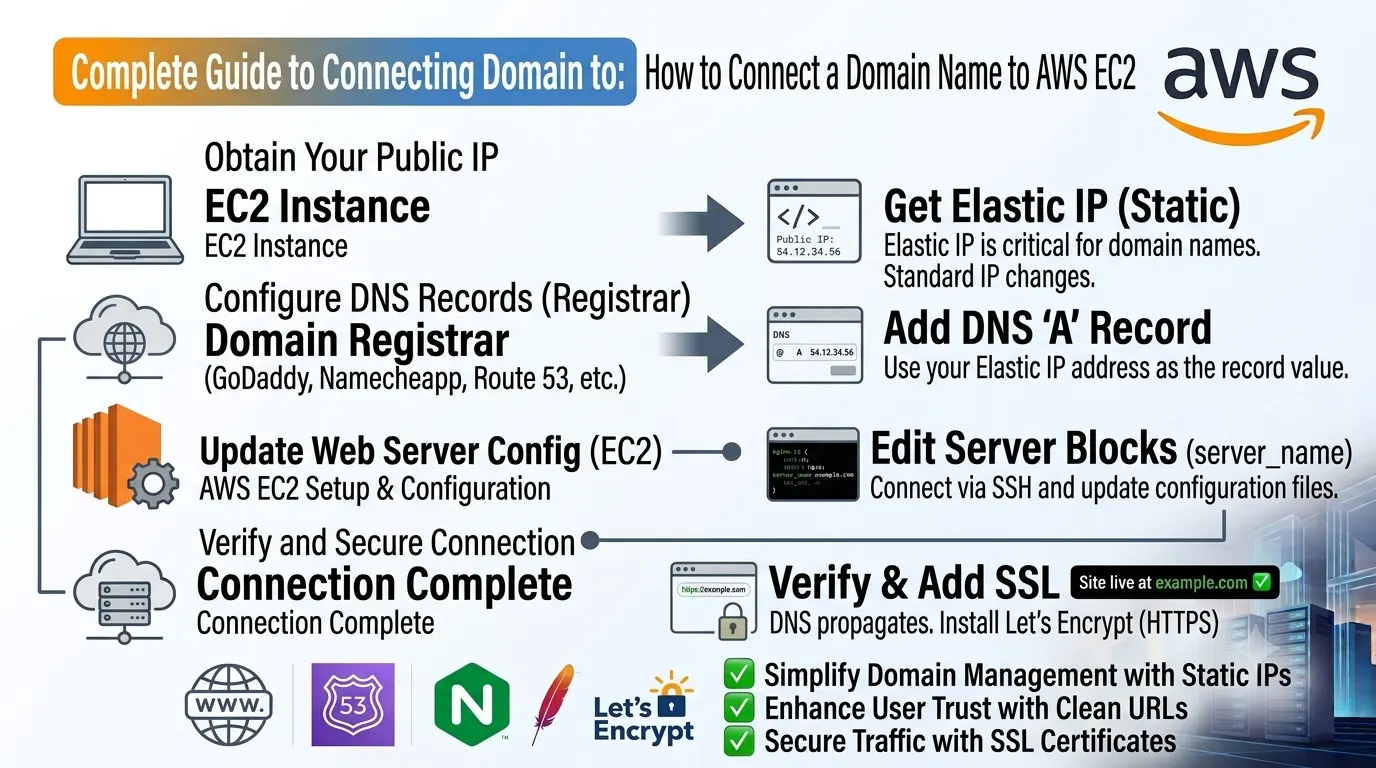
Step 11: Connect Your Domain
After confirming that the Next.js application works through Nginx, connect your domain to the AWS infrastructure.
Update your DNS records so that your domain points to the appropriate server or AWS service.
For a simple EC2 deployment, an Elastic IP can provide a stable public IP address.
After DNS changes have propagated, your Next.js website should be accessible through your domain.
Step 12: Enable HTTPS
HTTPS is essential for production websites.
It encrypts communication between the user’s browser and your server and protects sensitive information.
You can configure an SSL/TLS certificate for your domain and configure Nginx to handle HTTPS traffic.
Once HTTPS is enabled, HTTP requests should generally be redirected to HTTPS.
Using HTTPS also improves user trust and is important for many modern web platform features.
Step 13: Configure Next.js for Production
Before launching your application, review the production configuration.
Important areas include:
- Environment variables
- Node.js version
- Build configuration
- Image optimization
- API endpoints
- Authentication
- Logging
- Error handling
- Security headers
Make sure that development settings are not accidentally used in production.
Step 14: Optimize Next.js Performance
Next.js includes several features that can improve website performance.
You can optimize your application by:
- Optimizing images
- Reducing unnecessary JavaScript
- Using appropriate caching
- Compressing assets
- Lazy-loading resources
- Optimizing fonts
- Reducing unnecessary API requests
For websites with users in multiple geographic regions, Amazon CloudFront can also help deliver content closer to users.
Step 15: Deploy Application Updates
Once your website is running in production, you will eventually need to deploy new versions.
A typical update process includes:
- Pull the latest source code
- Install updated dependencies if required
- Configure updated environment variables
- Create a new production build
- Restart the Next.js process
- Test the application
- Check logs for errors
For larger projects, this process can be automated using CI/CD pipelines.
Automated deployments reduce manual work and help maintain consistency between releases.
Step 16: Monitor the Application
Deployment is not the final step.
A production application should be monitored continuously.
You can monitor:
- EC2 CPU usage
- Memory usage
- Network activity
- Server health
- Application logs
- Nginx errors
- Next.js errors
- Response times
AWS monitoring services can help track the health and resource usage of your infrastructure.
PM2 logs can also help identify application-level problems.
Common Next.js Deployment Problems
1. 502 Bad Gateway
A 502 error usually means that Nginx cannot communicate correctly with the Next.js application.
Check whether the Next.js process is running and verify that Nginx is forwarding requests to the correct port.
2. Application Is Not Starting
Check the Node.js version, installed dependencies, environment variables, and application logs.
PM2 logs can be especially useful when diagnosing startup errors.
3. Environment Variables Are Not Working
If environment variables are missing in production, verify that they are configured correctly and that the application has been rebuilt when required.
Remember that some Next.js environment variables are included during the build process.
4. Images Are Not Loading
If Next.js Image Optimization is being used, check the image configuration and allowed remote image domains or patterns.
Also verify that the image URLs are accessible from the production environment.
5. API Requests Are Failing
Check:
- Production API URL
- CORS configuration
- HTTPS configuration
- Backend availability
- Security groups
- Environment variables
Browser developer tools can help identify failed network requests.
6. Website Works Locally but Not on AWS
Differences between local and production environments can cause deployment problems.
Check Node.js versions, environment variables, build configuration, server permissions, network configuration, and application logs.
EC2 vs Other AWS Options for Next.js
EC2 is not the only way to host a Next.js application.
Depending on your application’s requirements, you can consider other AWS services and hosting architectures.
Amazon S3 and CloudFront
If your Next.js application can be fully exported as static files, S3 and CloudFront can provide an efficient static hosting solution.
However, applications that depend on server-side rendering or other server-side Next.js features generally require a runtime capable of executing the application.
AWS Amplify
AWS Amplify can simplify deployment and hosting for supported frontend applications and can integrate with Git-based workflows.
Amazon ECS
For teams using Docker and containerized deployments, Amazon ECS can provide a flexible way to run Next.js applications.
EC2
EC2 is a good option when you want direct control over the server, operating system, Node.js environment, Nginx configuration, and deployment process.
Best Practices for Next.js Deployment on AWS
Use HTTPS
Always protect your production website using HTTPS.
Keep Node.js Updated
Use a supported Node.js version and regularly review dependencies.
Protect Secrets
Never expose private credentials through client-side environment variables.
Use a Process Manager
Use PM2 or another appropriate process-management solution to keep the application running reliably.
Configure Nginx Properly
Use Nginx as a reverse proxy and configure it carefully for your Next.js deployment architecture.
Monitor Server Resources
Monitor CPU, memory, disk usage, network traffic, and application logs.
Automate Deployments
CI/CD pipelines can make deployments faster and reduce human errors.
Use a CDN When Appropriate
CloudFront can improve content delivery for users located in different geographic regions.
Conclusion
Deploying a Next.js website on AWS using EC2 and Nginx gives developers significant control over the production environment.
The basic architecture is:
AWS EC2 + Nginx + PM2 + Next.js
Nginx handles incoming web traffic, PM2 manages the Node.js process, and Next.js handles application rendering and functionality.
As your application grows, you can introduce additional AWS services such as CloudFront, Amazon RDS, S3, Elastic Load Balancing, Auto Scaling, ECS, and other cloud services.
With proper configuration, HTTPS, security practices, monitoring, performance optimization, and automated deployments, AWS EC2 provides a flexible environment for hosting production-ready Next.js applications.