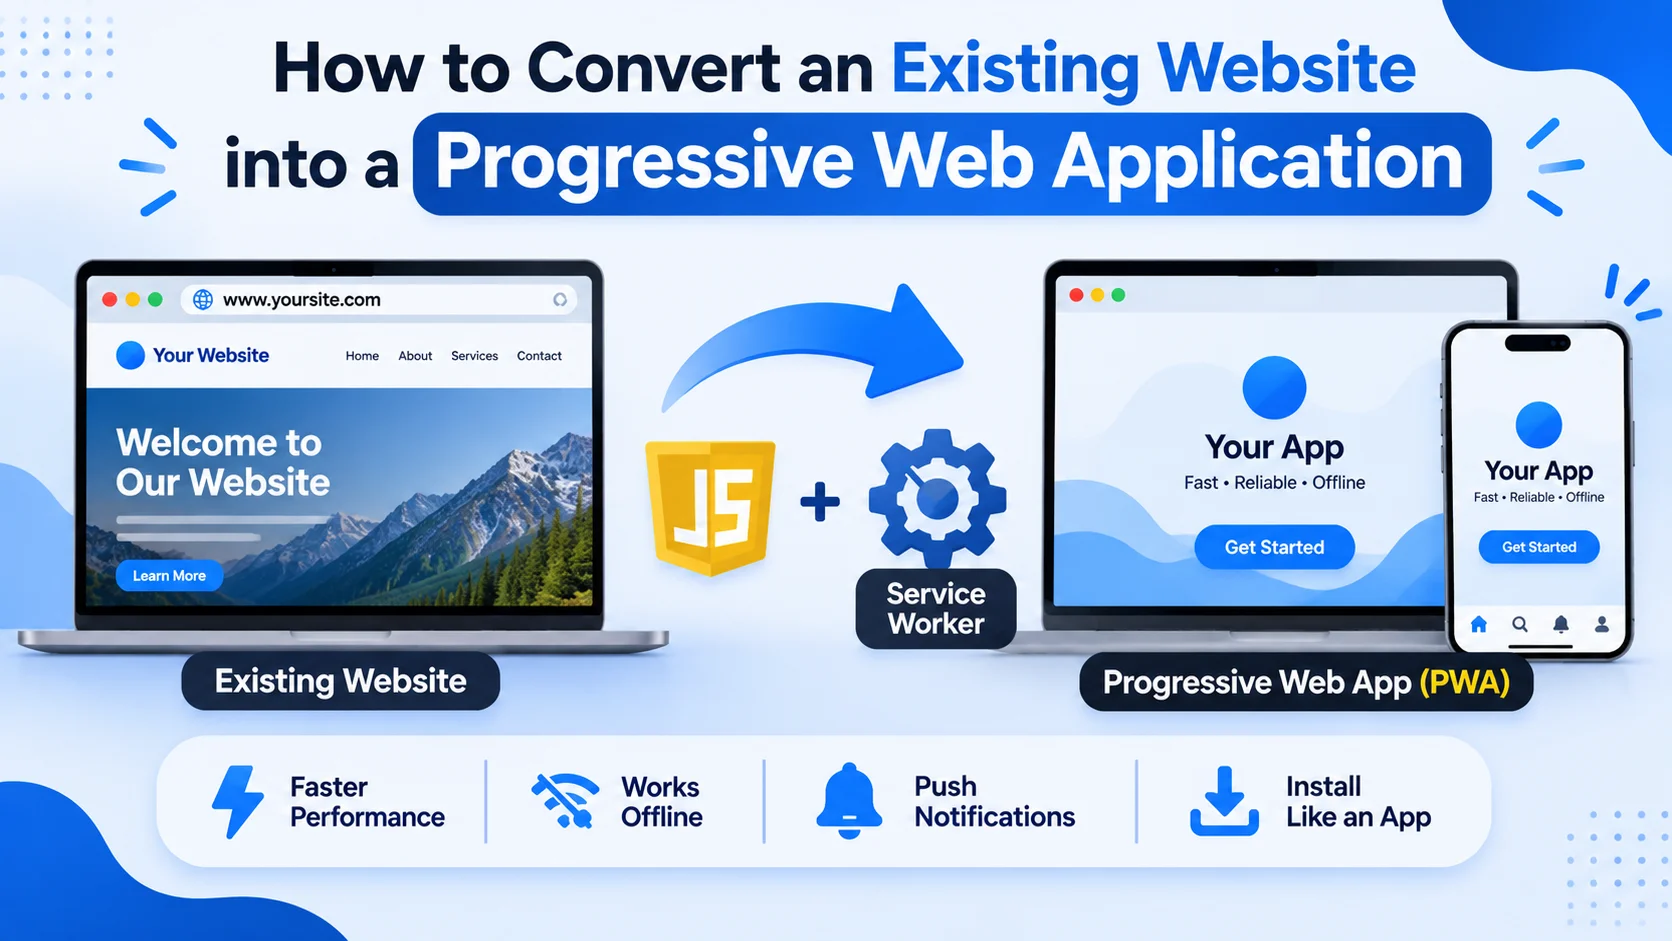
Many businesses already have websites that serve customers, display products, provide information, or support online services. However, traditional websites may not offer features such as offline access, app installation, background synchronization, and push notifications.
Converting an existing website into a Progressive Web Application (PWA) allows businesses to add these capabilities without rebuilding the entire platform from scratch.
A Progressive Web App combines modern web technologies with app-like functionality. It can provide a responsive interface, faster repeat visits through caching, installation on supported devices, and selected offline capabilities.
For businesses, this approach can improve the existing website experience while protecting their previous investment in website development.
In this guide, we explain how to convert an existing website into a Progressive Web Application, including technical requirements, development steps, Service Worker implementation, caching strategies, integrations, security, testing, and deployment.
1. What Is a Progressive Web Application?
A Progressive Web Application is a website enhanced with browser technologies that provide an app-like experience.
Unlike a traditional website, a PWA can support several additional capabilities:
- Installation on supported devices.
- Offline access to selected pages and resources.
- Faster loading through caching.
- Push notifications on supported platforms.
- Background synchronization where supported.
- Responsive layouts for mobile and desktop.
- Standalone application display.
A PWA continues to use standard web technologies such as HTML, CSS, and JavaScript. It does not necessarily require a complete replacement of the existing website architecture.
2. Evaluate the Existing Website
Before making changes, analyze the current website to determine which components can be reused and which need improvement.
Review the following areas:
| Website Component | What to Evaluate |
|---|---|
| Frontend | HTML, CSS, JavaScript, and framework structure |
| Backend | Existing APIs and server-side functionality |
| Responsive Design | Mobile, tablet, and desktop compatibility |
| Website Performance | Loading speed and resource optimization |
| Navigation | Page structure and user journeys |
| Authentication | Login, registration, and session management |
| Database | Existing data storage and API connectivity |
| Hosting | HTTPS and server configuration |
| Security | Authentication, permissions, and data protection |
This assessment helps identify technical limitations before implementation.
For example, a website that already uses responsive layouts and API-based architecture may require fewer changes than an older website with fixed-width pages and tightly coupled frontend functionality.
3. Identify the PWA Features to Implement
Not every website needs every PWA capability. Select features based on the website’s purpose and customer requirements.
A. Installable Website
Allow users to install the website on supported devices through the browser’s installation interface.
After installation, users can access the application from their home screen or application launcher where supported.
B. Offline Access
Make important pages and resources available when the internet connection is unavailable.
Examples include:
- Previously visited pages.
- Product information.
- Saved articles.
- Frequently accessed documents.
- Application navigation.
- Offline information screens.
C. Push Notifications
Send useful notifications about:
- Order updates.
- Appointment reminders.
- New products.
- Account activities.
- Important announcements.
- Service updates.
Push notifications require user permission and appropriate browser and platform support.
D. Faster Loading
Use caching, optimized images, compressed resources, and efficient API requests to improve website performance.
E. Background Synchronization
Allow supported browsers to retry certain operations when connectivity returns.
For example, users may submit a form while offline, save the information locally, and synchronize it when the network becomes available.
4. Prepare the Existing Website for PWA Conversion
Before implementing PWA features, make sure the existing website meets the basic technical requirements.
A. Enable HTTPS
Service Workers require a secure context. Production websites should use HTTPS, while localhost is generally accepted for local development.
Configure a valid SSL/TLS certificate and redirect HTTP traffic to HTTPS.
B. Improve Responsive Design
The existing website should work properly on mobile devices.
Review:
- Navigation menus.
- Page layouts.
- Buttons and forms.
- Image dimensions.
- Font sizes.
- Touch interactions.
- Mobile loading performance.
Use CSS media queries and flexible layouts to improve the mobile experience.
C. Optimize Website Resources
Identify unnecessary JavaScript, large images, unused CSS, and slow third-party resources.
Recommended improvements include:
- Image compression.
- JavaScript minification.
- CSS optimization.
- Lazy loading.
- Browser caching.
- Code splitting.
- Content Delivery Network integration.
D. Review Website Navigation
A PWA should provide a consistent experience when users open the application directly from an installed shortcut.
Check that important pages have stable URLs and that the application can handle direct navigation and page refreshes correctly.
5. Create the Web App Manifest
The Web App Manifest provides information about how the website should appear when installed.
Create a file named manifest.json in the website’s public directory.
Example:
{
  "id": "/",
  "name": "My Business Website",
  "short_name": "My Website",
  "description": "Official business website and web application",
  "start_url": "/",
  "scope": "/",
  "display": "standalone",
  "background_color": "#ffffff",
  "theme_color": "#2563eb",
  "icons": [
    {
      "src": "/icons/icon-192.png",
      "sizes": "192x192",
      "type": "image/png"
    },
    {
      "src": "/icons/icon-512.png",
      "sizes": "512x512",
      "type": "image/png"
    }
  ]
}
Important properties include:
id: Identifies the installed application.name: Full application name.short_name: Short display name.start_url: Starting page when the application launches.scope: Defines the application navigation scope.display: Controls the preferred display mode.background_color: Application launch background.theme_color: Browser interface theme color.icons: Application icon resources.
Add the manifest to the existing website’s HTML head:
<link rel="manifest" href="/manifest.json">
<meta name="theme-color" content="#2563eb">
Use appropriate icon sizes and verify the manifest against the installation requirements of your target browsers.
6. Implement Service Worker Registration
A Service Worker is essential for many PWA capabilities, including offline caching and request interception.
Create a JavaScript file named sw.js in the appropriate location.
Register it from the existing website’s JavaScript code:
if ("serviceWorker" in navigator) {

    window.addEventListener("load", async () => {

        try {

            const registration =
                await navigator.serviceWorker.register("/sw.js");

            console.log(
                "Service Worker registered:",
                registration.scope
            );

        } catch (error) {

            console.error(
                "Service Worker registration failed:",
                error
            );

        }

    });

}
This code checks browser support and registers the Service Worker after the page loads.
If the website already uses a JavaScript framework, place the registration logic in an appropriate application initialization module.
The Service Worker scope should be planned carefully because it determines which pages and requests it can control.
7. Configure Service Worker Caching
Caching allows the application to reuse previously stored resources instead of downloading everything again.
Start by defining a cache version and the essential website resources.
const CACHE_NAME = "business-pwa-v1";

const APP_FILES = [
    "/",
    "/offline.html",
    "/css/style.css",
    "/js/app.js",
    "/manifest.json",
    "/icons/icon-192.png",
    "/icons/icon-512.png"
];
A. Cache Essential Resources
Use the install event to store required application files.
self.addEventListener("install", (event) => {

    event.waitUntil(

        caches.open(CACHE_NAME)
            .then((cache) => cache.addAll(APP_FILES))

    );

});
If a required file is missing or cannot be fetched, the cache installation may fail. Verify all resource paths before deployment.
B. Remove Old Caches
When the application is updated, the activation event can remove outdated cache versions.
self.addEventListener("activate", (event) => {

    event.waitUntil(

        caches.keys().then((cacheNames) => {

            return Promise.all(

                cacheNames.map((cacheName) => {

                    if (cacheName !== CACHE_NAME) {
                        return caches.delete(cacheName);
                    }

                })

            );

        })

    );

});
Use controlled cache versioning so users do not continue receiving outdated website resources.
C. Intercept Network Requests
The fetch event allows the Service Worker to handle supported requests.
self.addEventListener("fetch", (event) => {

    if (event.request.method !== "GET") {
        return;
    }

    const url = new URL(event.request.url);

    if (url.origin !== self.location.origin) {
        return;
    }

    event.respondWith(

        caches.match(event.request)
            .then((cachedResponse) => {

                if (cachedResponse) {
                    return cachedResponse;
                }

                return fetch(event.request);

            })

    );

});
This example uses a basic cache-first approach for same-origin GET requests.
For a production website, use different caching rules for HTML pages, static assets, images, and dynamic API responses.
8. Add Offline Website Functionality
A major benefit of converting a website into a PWA is the ability to provide selected content without an active internet connection.
However, caching the homepage alone does not make the complete website available offline.
You should identify which pages and information are suitable for offline access.
For example:
| Website Type | Useful Offline Content |
|---|---|
| E-commerce Website | Previously viewed product information |
| News Website | Saved articles |
| Business Website | Company information and contact details |
| Booking Website | Saved booking details and pending requests |
| Educational Website | Downloaded learning materials |
| Customer Portal | Selected cached information |
Create an offline.html page that informs visitors when network access is unavailable.
Example:
<!DOCTYPE html>
<html lang="en">
<head>
    <meta charset="UTF-8">
    <meta name="viewport" content="width=device-width, initial-scale=1.0">
    <title>Offline</title>
</head>
<body>

    <h1>You are currently offline</h1>

    <p>
        Please check your internet connection
        and try again.
    </p>

</body>
</html>
Cache this page and use it as a navigation fallback.
self.addEventListener("fetch", (event) => {

    if (event.request.mode !== "navigate") {
        return;
    }

    event.respondWith(

        fetch(event.request).catch(async () => {

            return await caches.match("/offline.html");

        })

    );

});
For dynamic content, consider IndexedDB to store selected records locally.
If users can create or edit data offline, implement a pending-operation queue and synchronize changes with the backend when connectivity returns.
9. Add an Application Installation Option
Once the manifest and other installation requirements are configured, supported browsers may offer an installation option.
Developers can capture the beforeinstallprompt event in browsers that support it.
let deferredPrompt = null;

window.addEventListener(
    "beforeinstallprompt",
    (event) => {

        event.preventDefault();

        deferredPrompt = event;

        const installButton =
            document.getElementById("installButton");

        if (installButton) {
            installButton.hidden = false;
        }

    }
);

async function installWebsite() {

    if (!deferredPrompt) {
        return;
    }

    deferredPrompt.prompt();

    const result = await deferredPrompt.userChoice;

    console.log("Installation:", result.outcome);

    deferredPrompt = null;

}
Add an installation button to the existing website and connect it to the installWebsite() function.
Installation interfaces differ between browsers and operating systems. Some platforms provide their own browser menu or installation flow instead of exposing this event.
10. Integrate Push Notifications
Push notifications allow businesses to communicate with users even when they are not actively viewing the website.
A website can use the Push API and Notifications API together with a Service Worker.
The implementation generally involves:
- Request notification permission.
- Register the Service Worker.
- Subscribe using the Push API.
- Send the subscription information securely to the backend.
- Trigger notifications from the backend through a push service.
- Handle incoming notifications in the Service Worker.
Example notification handler:
self.addEventListener("push", (event) => {

    const data = event.data
        ? event.data.json()
        : {};

    event.waitUntil(

        self.registration.showNotification(
            data.title || "Website Notification",
            {
                body: data.body || "You have a new update.",
                icon: "/icons/icon-192.png",
                data: {
                    url: data.url || "/"
                }
            }
        )

    );

});
You can also handle notification clicks:
self.addEventListener("notificationclick", (event) => {

    event.notification.close();

    const targetUrl =
        event.notification.data?.url || "/";

    event.waitUntil(

        clients.openWindow(targetUrl)

    );

});
Push notification support varies by browser and operating system. Always request permission in an appropriate user interaction and provide notification preference controls.
11. Connect Existing Backend APIs
One major advantage of PWA conversion is that an existing backend can often be reused.
If the website already has APIs for user accounts, products, bookings, or payments, the PWA can continue using those services.
For example:
async function loadWebsiteData() {

    try {

        const response =
            await fetch("/api/website-data");

        if (!response.ok) {
            throw new Error("Failed to load website data");
        }

        const data = await response.json();

        console.log(data);

    } catch (error) {

        console.error("API request failed:", error);

    }

}
Before reusing existing APIs, check whether they support the requirements of the new application experience.
Important considerations include:
- Authentication and authorization.
- API response performance.
- Error handling.
- Pagination.
- Rate limiting.
- Offline behavior.
- Data synchronization.
- Secure session management.
Sensitive transactions, such as payments and account updates, should be validated by the backend rather than relying on cached frontend data.
12. Handle Existing Login and User Sessions
If the existing website already supports user registration and login, the PWA can usually reuse its authentication system.
However, test session behavior carefully.
Important areas include:
- Login and logout.
- Session expiration.
- Password recovery.
- Authentication persistence.
- Role-based access.
- Protected pages.
- API authorization.
Avoid storing passwords, access tokens, or sensitive account information in general-purpose caches.
If the website uses cookies, configure appropriate Secure, HttpOnly, and SameSite attributes based on the authentication architecture.
Offline users should receive a clear indication that authenticated server operations cannot be completed without connectivity.
13. Optimize Website Performance
Converting a website into a PWA is also an opportunity to improve its overall performance.
Use the following techniques:
- Minify CSS and JavaScript.
- Compress images.
- Use WebP or AVIF where appropriate.
- Lazy-load images and noncritical resources.
- Reduce unnecessary third-party scripts.
- Optimize font loading.
- Use efficient API requests.
- Implement suitable cache expiration policies.
- Use a CDN for static assets.
- Monitor Core Web Vitals.
Measure performance before and after conversion to identify whether the changes actually improve loading speed and user experience.
14. Choose the Right Technology Stack
The technology stack depends on the existing website architecture.
| Component | Recommended Technologies |
|---|---|
| Frontend | HTML, CSS, JavaScript |
| Frontend Framework | React, Vue.js, Angular, or existing framework |
| Backend | Node.js, Laravel, Django, or ASP.NET Core |
| Database | PostgreSQL, MySQL, or MongoDB |
| Service Worker | Native JavaScript or Workbox |
| Local Storage | IndexedDB |
| Cache Management | Cache API |
| Push Notifications | Web Push API |
| Hosting | AWS, Azure, Google Cloud, or compatible hosting |
| Performance Testing | Lighthouse and browser developer tools |
For an existing website, retaining the current framework is often more practical than migrating to an entirely new frontend technology.
Workbox can also simplify Service Worker development by providing reusable caching and routing tools.
15. Test the Converted PWA
Testing is important because the website must continue working as expected after PWA features are introduced.
| Testing Type | What to Validate |
|---|---|
| Functional Testing | Existing website functionality |
| Responsive Testing | Mobile and desktop layouts |
| Manifest Testing | Application metadata and icons |
| Service Worker Testing | Registration and lifecycle |
| Offline Testing | Cached resources and fallback pages |
| Installation Testing | Supported browser installation flows |
| Push Testing | Subscription and notification delivery |
| API Testing | Existing backend integrations |
| Security Testing | Authentication and sensitive data |
| Performance Testing | Loading speed and resource usage |
Test different browsers and operating systems rather than assuming that all PWA capabilities behave identically.
Use Lighthouse and browser developer tools to identify configuration problems and performance issues.
16. Deploy the Converted PWA
After testing, deploy the updated website with its PWA resources.
The deployment process generally includes:
- Publish the updated frontend files.
- Upload the Web App Manifest.
- Deploy the Service Worker.
- Configure HTTPS.
- Verify Service Worker scope.
- Configure appropriate cache headers.
- Test installation behavior.
- Verify offline functionality.
- Test push notification delivery.
- Monitor application performance and errors.
When updating an existing website, plan cache versioning carefully. Old Service Workers and cached resources can otherwise cause users to see outdated versions.
17. Common Challenges During PWA Conversion
| Challenge | Recommended Solution |
|---|---|
| Existing website is not responsive | Improve mobile layouts before conversion |
| Incorrect Service Worker scope | Place and register the worker at the appropriate path |
| Old content appears after updates | Implement versioned caches and update handling |
| Offline pages fail | Pre-cache essential resources and fallback pages |
| Dynamic data becomes outdated | Use network-aware caching strategies |
| Authentication issues | Review session and API authorization behavior |
| Push notifications do not work | Check browser and platform support |
| Large website resources | Optimize files and cache selectively |
| Existing scripts conflict | Test the Service Worker with current application code |
| Sensitive data is cached | Exclude private responses from shared caching |
A gradual implementation approach helps reduce the risk of disrupting the existing website.
18. Development Cost and Timeline
The cost of converting an existing website into a PWA depends on its current architecture, performance, design, backend integrations, and required offline features.
A typical development timeline may look like this:
| Development Phase | Estimated Timeline |
|---|---|
| Existing Website Audit | 1–2 weeks |
| UI and Responsive Improvements | 1–3 weeks |
| Manifest Configuration | 1–2 days |
| Service Worker Development | 1–2 weeks |
| Caching and Offline Functionality | 1–3 weeks |
| Installation and Push Notifications | 1–2 weeks |
| Backend Integration | 1–2 weeks |
| Testing and Deployment | 1–2 weeks |
Estimated overall timeline: 6–12 weeks, depending on the website’s complexity, existing code quality, required functionality, and integrations. Some activities can run in parallel.
A simple website with responsive layouts and existing APIs may require less work than a complex e-commerce platform or customer portal.
Conclusion
Converting an existing website into a Progressive Web Application allows businesses to add modern application capabilities without necessarily rebuilding their entire digital platform.
By introducing a Web App Manifest, Service Workers, caching, offline support, and installation functionality, developers can improve the existing website experience across supported devices.
The most effective approach is to evaluate the existing architecture, retain reusable components, introduce PWA capabilities gradually, and test every feature before deployment.
With proper implementation, a traditional website can evolve into a more responsive, installable, and reliable web application.
Looking to convert your existing website into a Progressive Web Application? Dotcube Technologies can help upgrade your website with modern PWA capabilities and software development solutions tailored to your business requirements.
Contact Dotcube Technologies: https://www.dotcubetechnologies.com/#contact