Deploying a website or web application on an AWS EC2 instance is only one part of putting your application online. To make your application accessible through a professional URL such as example.com, you also need to connect your domain name to your AWS EC2 server.
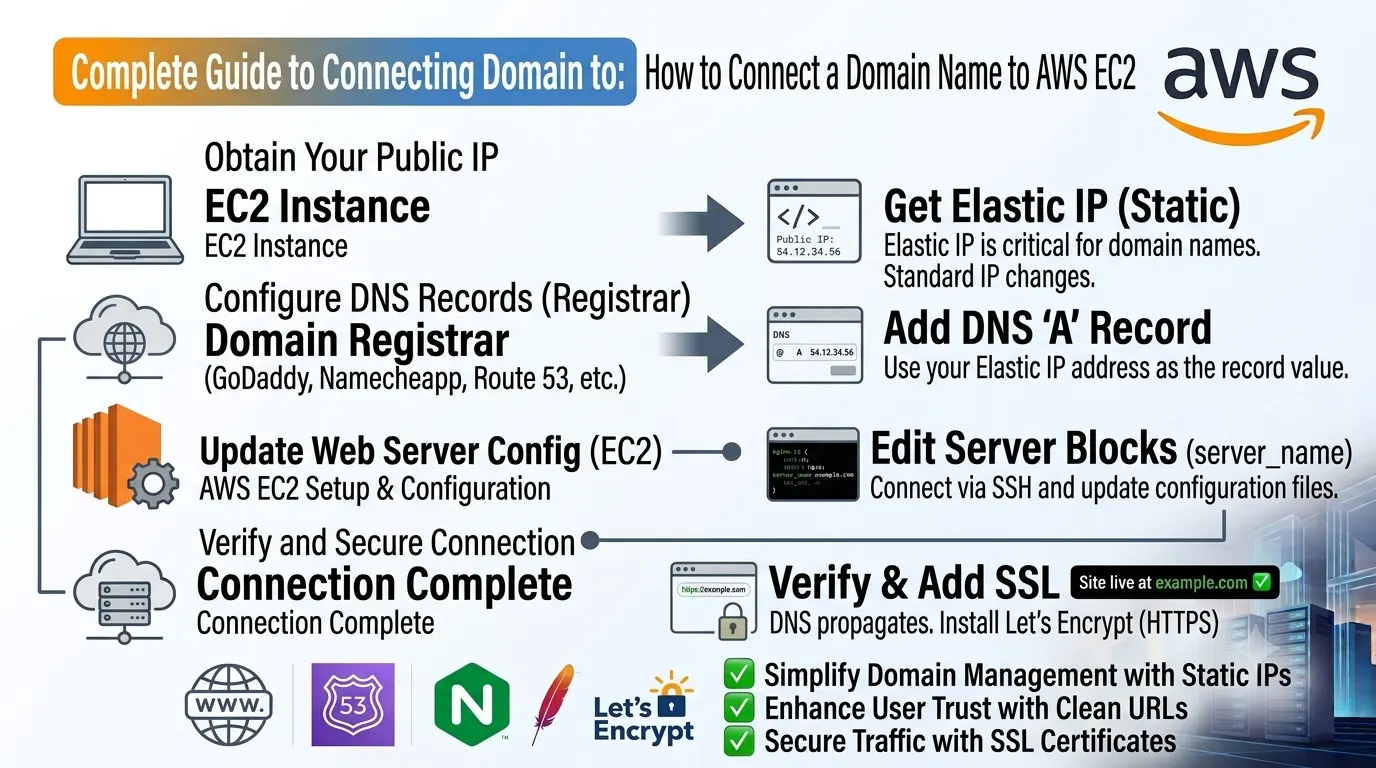
Connecting a domain to AWS EC2 involves configuring DNS records, assigning a stable IP address to your EC2 instance, and configuring your web server to respond to requests for your domain.
In this guide, we’ll explain how to connect a domain name to AWS EC2 step by step, including DNS configuration, Elastic IP, Nginx setup, HTTPS, and common troubleshooting steps.
What Is AWS EC2?
Amazon EC2 (Elastic Compute Cloud) is an AWS service that provides virtual servers for hosting websites, APIs, applications, and other workloads.
With an EC2 instance, you can install and configure technologies such as:
- Node.js
- React
- Next.js
- Python
- Django
- PHP
- Laravel
- Nginx
- Docker
- MySQL and PostgreSQL
However, an EC2 instance normally has a public IP address rather than a memorable domain name.
For example:
http://54.123.45.67
Instead of asking users to remember an IP address, you can connect a domain:
https://example.com
This provides a much more professional and user-friendly way to access your application.
Why Connect a Domain to AWS EC2?
Using a custom domain provides several advantages.
1. Professional Website Address
A domain such as:
example.com
is easier to remember than:
54.123.45.67
2. Better Branding
A custom domain helps establish your company’s brand and makes your website look more professional.
3. HTTPS Support
Once your domain points to your EC2 server, you can configure an SSL certificate and enable HTTPS.
4. Easier Application Access
Users can access your website without knowing the server’s IP address.
5. Better Production Setup
A domain combined with Nginx, HTTPS, and a stable IP provides a more reliable production architecture.
How Domain and EC2 Work Together
Before configuring anything, it is useful to understand the basic architecture.
A typical setup looks like this:
User
  ↓
example.com
  ↓
DNS Provider
  ↓
Elastic IP
  ↓
AWS EC2
  ↓
Nginx
  ↓
Application
When someone enters example.com in their browser, DNS tells the browser which IP address belongs to that domain.
The request then reaches your EC2 instance, where Nginx or another web server handles the request and forwards it to your application if necessary.
Prerequisites
Before connecting your domain to EC2, you should have:
- An AWS account
- A running EC2 instance
- A domain name
- Access to your domain’s DNS settings
- A web server such as Nginx
- Your application running on the EC2 instance
- SSH access to the EC2 server
You can purchase a domain from providers such as:
- Namecheap
- GoDaddy
- Cloudflare Registrar
- Hostinger
- Google-related domain services where available
The domain registrar does not have to be AWS.
You can purchase your domain from one provider and host your application on AWS.
Step 1: Launch an AWS EC2 Instance
The first step is to create an EC2 instance if you don’t already have one.
From the AWS Management Console, open:
EC2 → Instances → Launch Instance
Choose an operating system such as Ubuntu.
For a basic website or development application, you can start with a small instance and scale it later as your requirements increase.
After launching the instance, make sure you can connect to it using SSH.
For example:
ssh -i your-key.pem ubuntu@YOUR_EC2_IP
The exact username depends on the operating system you selected.
Step 2: Configure the EC2 Security Group
Your EC2 security group controls which network traffic can reach your server.
For a typical website, you should allow:
SSH    → TCP 22
HTTP   → TCP 80
HTTPS  → TCP 443
A typical configuration might look like:
| Type | Port | Source |
|---|---|---|
| SSH | 22 | Your IP |
| HTTP | 80 | 0.0.0.0/0 |
| HTTPS | 443 | 0.0.0.0/0 |
For SSH, it is better to restrict access to your own IP address rather than allowing the entire internet.
HTTP and HTTPS normally need to be publicly accessible for a public website.
Step 3: Assign an Elastic IP to EC2
This is one of the most important steps.
An EC2 instance’s public IPv4 address can change when the instance is stopped and started.
If your domain points directly to a temporary public IP and that IP changes, your website may stop working.
AWS provides Elastic IP addresses for this purpose.
An Elastic IP gives your EC2 instance a stable public IPv4 address.
How to Create an Elastic IP
In the AWS Console:
EC2 → Network & Security → Elastic IPs
Choose:
Allocate Elastic IP address
After creating it, select the Elastic IP and choose:
Associate Elastic IP address
Then select your EC2 instance.
You will now have a stable IP address such as:
18.123.45.67
Your domain can point to this address.
Remember that AWS pricing and Elastic IP behavior can change over time, so check the current AWS pricing and billing documentation before deploying production infrastructure.
Step 4: Find Your Domain’s DNS Settings
Now you need to configure your domain.
Log in to the company where you purchased your domain.
Look for an option such as:
- DNS Management
- DNS Settings
- Manage DNS
- DNS Records
- Zone Editor
The exact interface will depend on your domain provider.
You should see records such as:
A
AAAA
CNAME
MX
TXT
NS
For connecting a domain to an EC2 IPv4 address, the main record you usually need is an A record.
Step 5: Create an A Record
An A record connects a domain name to an IPv4 address.
Suppose your EC2 Elastic IP is:
18.123.45.67
You can create an A record such as:
Type: A
Name: @
Value: 18.123.45.67
TTL: 3600
The @ usually represents the root domain.
This means:
example.com
will point to:
18.123.45.67
The exact field names can differ between DNS providers.
Step 6: Configure the www Subdomain
You may also want:
www.example.com
to work.
There are two common approaches.
Option 1: CNAME
Create:
Type: CNAME
Name: www
Value: example.com
This makes:
www.example.com
point to:
example.com
Option 2: A Record
You can also point www directly to your EC2 Elastic IP.
However, using a CNAME for www is often easier to maintain because the www hostname follows the main domain.
Step 7: Wait for DNS Propagation
DNS changes are not always visible immediately.
Depending on your DNS provider, caching, and TTL settings, changes can take some time to propagate.
You can check whether your domain resolves to your EC2 IP using DNS lookup tools or commands.
For example:
nslookup example.com
or:
dig example.com
You should eventually see your EC2 Elastic IP in the response.
For example:
example.com → 18.123.45.67
If the domain resolves to the correct IP, the DNS configuration is working.
Step 8: Install Nginx on EC2
If you haven’t already configured a web server, Nginx is a popular option.
On Ubuntu, you can install it with:
sudo apt update
sudo apt install nginx -y
Start Nginx:
sudo systemctl start nginx
Enable it to start automatically:
sudo systemctl enable nginx
Check its status:
sudo systemctl status nginx
Now open:
http://YOUR_ELASTIC_IP
You should see the default Nginx page if the configuration is correct.
Step 9: Configure Nginx for Your Domain
Now you need to tell Nginx which domain should be handled by your server.
On Ubuntu, you can create a server configuration file:
sudo nano /etc/nginx/sites-available/example.com
A basic configuration for a website might look like:
server {
    listen 80;
    server_name example.com www.example.com;

    root /var/www/example.com;
    index index.html index.htm;
}
This tells Nginx to respond to:
example.com
www.example.com
Step 10: Configure Nginx as a Reverse Proxy
If your application runs on Node.js, Next.js, Express, or another backend server, you may need Nginx to act as a reverse proxy.
For example, suppose your application is running on:
localhost:3000
Your Nginx configuration can be:
server {
    listen 80;

    server_name example.com www.example.com;

    location / {
        proxy_pass http://127.0.0.1:3000;

        proxy_http_version 1.1;
        proxy_set_header Upgrade $http_upgrade;
        proxy_set_header Connection "upgrade";

        proxy_set_header Host $host;
        proxy_set_header X-Real-IP $remote_addr;
        proxy_set_header X-Forwarded-For $proxy_add_x_forwarded_for;
        proxy_set_header X-Forwarded-Proto $scheme;
    }
}
Now the architecture becomes:
User
 ↓
example.com
 ↓
Nginx :80
 ↓
Node.js / Next.js :3000
Users don’t need to access port 3000 directly.
Step 11: Enable the Nginx Configuration
Create a symbolic link:
sudo ln -s /etc/nginx/sites-available/example.com /etc/nginx/sites-enabled/
Test the configuration:
sudo nginx -t
If the configuration is valid, you should see a successful syntax check.
Then reload Nginx:
sudo systemctl reload nginx
You can now open:
http://example.com
Step 12: Configure HTTPS
Once your domain is correctly pointing to your EC2 instance, you should enable HTTPS.
HTTPS encrypts communication between the user’s browser and your server.
One common option is Let’s Encrypt, which provides free SSL/TLS certificates.
For Nginx on Ubuntu, Certbot can be used to obtain and configure the certificate.
Install Certbot:
sudo apt update
sudo apt install certbot python3-certbot-nginx -y
Then run:
sudo certbot --nginx -d example.com -d www.example.com
Certbot can configure Nginx and install the certificate.
After successful configuration, your website should be accessible through:
https://example.com
You should also configure automatic certificate renewal and verify that renewal works correctly.
Step 13: Redirect HTTP to HTTPS
For production websites, you generally want users to use HTTPS.
A properly configured Certbot/Nginx setup can automatically redirect HTTP traffic to HTTPS.
The desired behavior is:
http://example.com
        ↓
https://example.com
This ensures visitors use the encrypted version of your website.
Step 14: Test Your Domain
After completing the configuration, test several URLs:
http://example.com
https://example.com
http://www.example.com
https://www.example.com
Make sure all required versions work correctly.
You should also verify:
- DNS resolution
- SSL certificate
- Nginx configuration
- Application status
- EC2 security group
- Domain redirects
Common Problems When Connecting a Domain to EC2
Sometimes the domain does not work immediately. Here are some common issues.
1. Domain Still Shows the Old Website
If the domain previously pointed to another server, DNS caching may still be active.
Wait for DNS changes to propagate and verify the current DNS records.
2. Domain Points to the Wrong IP
Check your A record.
For example:
A → 18.123.45.67
Make sure the IP matches your EC2 Elastic IP.
3. EC2 Public IP Changed
If you are using a normal dynamic public IP instead of an Elastic IP, the address may change after certain stop/start operations.
Use an Elastic IP for a stable IPv4 address.
4. Nginx Shows the Default Page
If you see the default Nginx page instead of your application, your domain’s Nginx server block may not be configured correctly.
Check:
sudo nginx -t
Then review your configuration files.
5. 502 Bad Gateway
A 502 Bad Gateway error commonly occurs when Nginx cannot connect to your application.
For example, if Nginx is configured to use:
127.0.0.1:3000
make sure your application is actually running on port 3000.
For a Node.js application, you can check running processes and application logs.
6. HTTPS Is Not Working
Check that:
- DNS points to the correct server
- Port 443 is allowed in the EC2 security group
- Nginx is running
- The SSL certificate was successfully installed
- Your domain resolves correctly
AWS Route 53 vs Third-Party DNS Providers
You don’t have to use Amazon Route 53 to connect your domain to EC2.
You can use:
Domain Registrar
       ↓
Third-Party DNS
       ↓
EC2 Elastic IP
Or:
Domain Registrar
       ↓
Route 53
       ↓
EC2 Elastic IP
AWS Route 53 is useful when you want to manage your DNS infrastructure inside AWS.
For a simple website, a third-party DNS provider can also work perfectly well.
Should You Use an Elastic IP?
For many traditional EC2-hosted websites, using a stable IP is important.
Without a stable address:
Domain
 ↓
Old IP
 ↓
EC2
If the EC2 public IP changes, the domain may stop reaching the server.
With a stable IP:
Domain
 ↓
Elastic IP
 ↓
EC2
your DNS configuration remains consistent.
Always review current AWS pricing and IP-address policies because AWS infrastructure pricing and behavior can change.
Domain Setup for Different Applications
The basic domain configuration is similar, but the Nginx setup can differ depending on your application.
React
A production React application can usually be built into static files and served directly by Nginx.
Domain
 ↓
Nginx
 ↓
React static files
Next.js
A dynamic Next.js application can run as a Node.js process behind Nginx.
Domain
 ↓
Nginx
 ↓
Next.js
Node.js / Express
Nginx can act as a reverse proxy:
Domain
 ↓
Nginx
 ↓
Express.js
Laravel
Nginx can serve the Laravel application through PHP-FPM:
Domain
 ↓
Nginx
 ↓
PHP-FPM
 ↓
Laravel
Django
Django is commonly deployed behind Nginx with Gunicorn or another application server:
Domain
 ↓
Nginx
 ↓
Gunicorn
 ↓
Django
Recommended Production Architecture
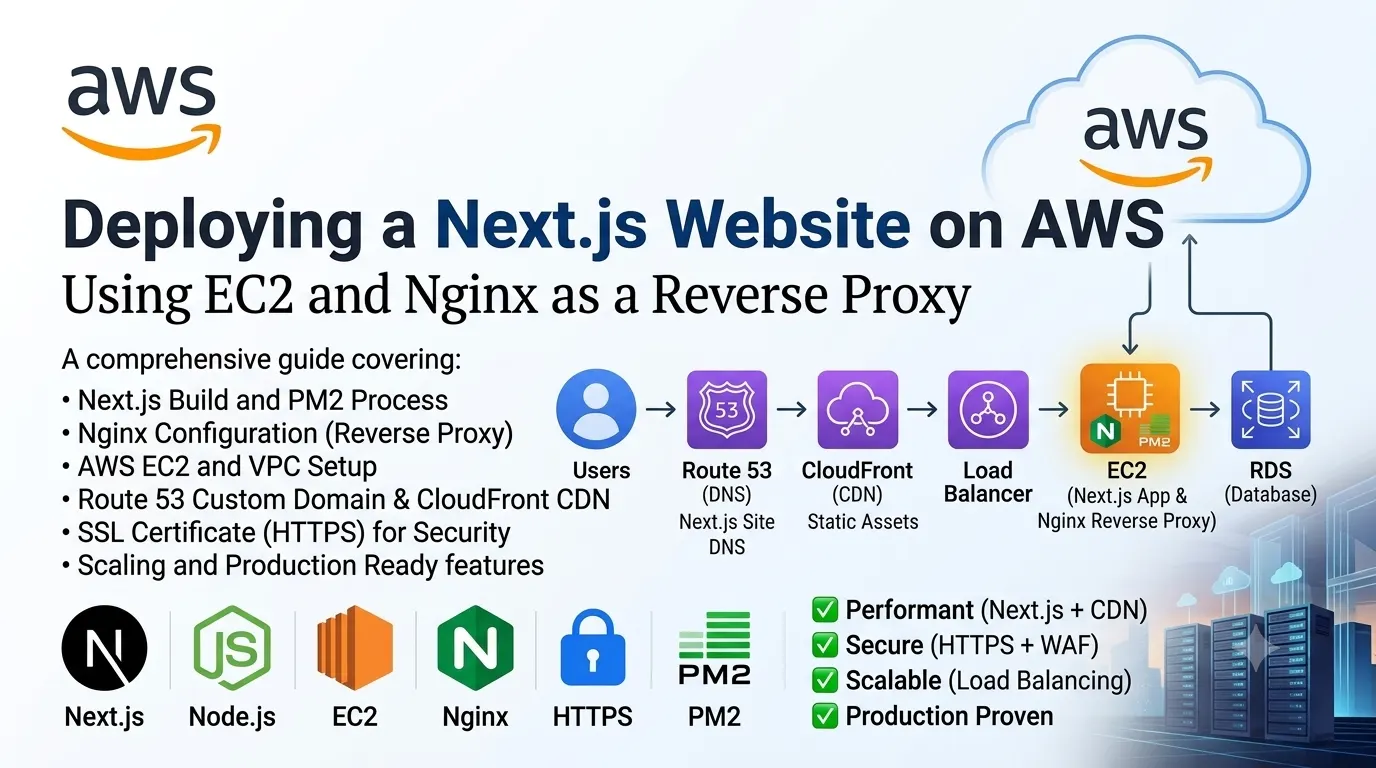
For a typical web application deployed on EC2, a production architecture could look like:
                    Internet
                       │
                       ▼
                example.com
                       │
                       ▼
                     DNS
                       │
                       ▼
                 Elastic IP
                       │
                       ▼
                  AWS EC2
                       │
                       ▼
                    Nginx
                       │
                       ▼
              Application Server
                       │
             ┌─────────┴─────────┐
             ▼                   ▼
          Backend             Frontend
             │
             ▼
          Database
For larger applications, you may eventually introduce services such as:
- Application Load Balancer
- Auto Scaling
- Amazon RDS
- Amazon S3
- CloudFront
- Route 53
- Amazon ECS
- Amazon EKS
The right architecture depends on your application’s traffic, availability requirements, security requirements, and budget.
Security Best Practices
When connecting a domain to an EC2 server, don’t focus only on making the website work. Security is equally important.
Keep Your Server Updated
Regularly update system packages:
sudo apt update
sudo apt upgrade
Restrict SSH Access
Avoid allowing SSH access from anywhere unless there is a specific reason.
Instead of:
0.0.0.0/0
use your trusted IP where practical.
Use HTTPS
Always use HTTPS for production websites.
Protect Application Secrets
Never place passwords, API keys, or private credentials directly inside public frontend code.
Use secure environment variables and appropriate AWS secret-management solutions where required.
Keep Databases Private
If your application uses a database, avoid exposing database ports directly to the public internet unless there is a strong architectural reason.
Monitor Your Server
Use AWS monitoring tools and application logs to identify failures, unusual traffic, and resource problems.
Useful Commands
Here are some useful commands when troubleshooting a domain and Nginx setup.
Check Nginx status:
sudo systemctl status nginx
Test Nginx configuration:
sudo nginx -t
Reload Nginx:
sudo systemctl reload nginx
Restart Nginx:
sudo systemctl restart nginx
View Nginx error logs:
sudo tail -f /var/log/nginx/error.log
View access logs:
sudo tail -f /var/log/nginx/access.log
Check DNS:
nslookup example.com
Check DNS using dig:
dig example.com
Final Checklist
Before considering your domain setup complete, verify the following:
- EC2 instance is running
- Elastic IP is assigned
- Security group allows HTTP
- Security group allows HTTPS
- Domain A record points to the Elastic IP
wwwrecord is configured if required- DNS has propagated
- Nginx is installed
- Nginx server block is configured
- Application is running
- Nginx reverse proxy is working if required
- SSL certificate is installed
- HTTPS is working
- HTTP redirects to HTTPS
- Application logs are monitored
Conclusion
Connecting a domain name to AWS EC2 is a straightforward process once you understand how DNS, Elastic IPs, security groups, and Nginx work together.
The basic process is:
Buy Domain
    ↓
Create EC2 Instance
    ↓
Assign Elastic IP
    ↓
Create DNS A Record
    ↓
Configure Nginx
    ↓
Connect Application
    ↓
Enable HTTPS
    ↓
Test Domain
For a small website, this setup can provide a simple and cost-effective way to host your application on AWS. As your traffic and infrastructure requirements grow, you can expand the architecture using services such as Route 53, CloudFront, load balancers, Auto Scaling, and Amazon RDS.
With the right DNS, server, and security configuration, your EC2-hosted application can be accessed through a professional domain while remaining ready for future scaling.