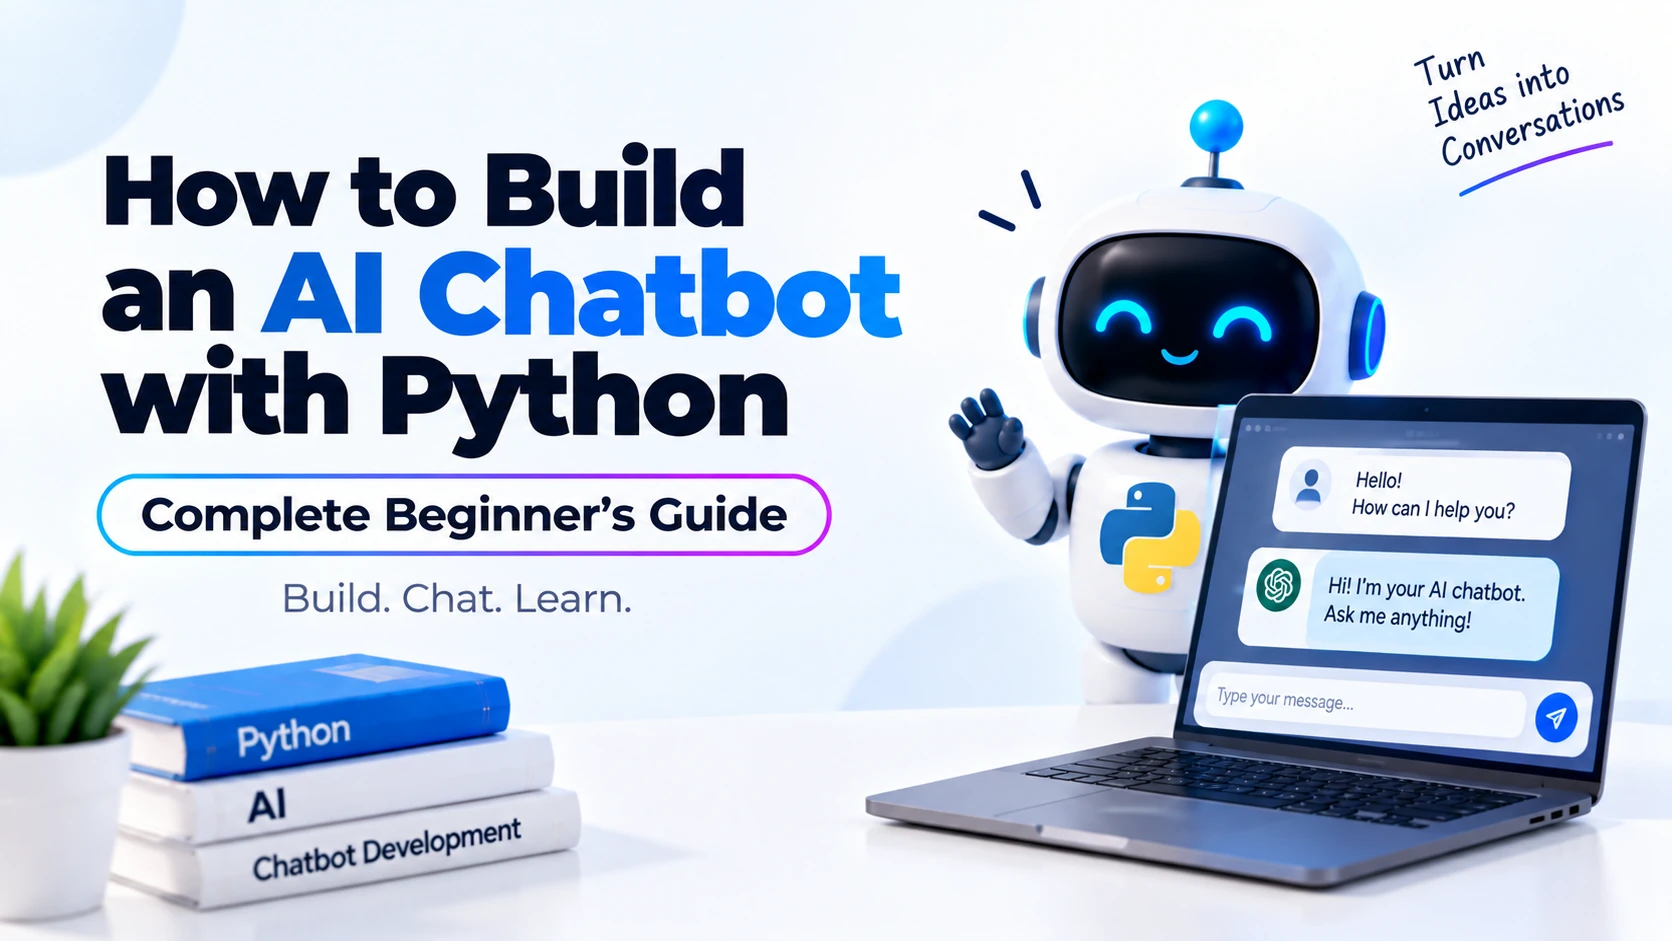
AI chatbots are now used in websites, mobile applications, customer support systems, learning platforms, productivity tools, and many other applications.
A modern AI chatbot can understand natural-language questions and generate conversational responses using a Large Language Model, commonly called an LLM.
The good news is that you do not need to train your own AI model to build one.
Using Python and an LLM API, you can create a basic AI chatbot with relatively little code.
In this beginner-friendly guide, you will learn:
- What an AI chatbot is
- How an AI chatbot works
- What tools you need
- How to set up a Python project
- How to connect Python to an LLM
- How to accept user messages
- How to generate AI responses
- How to create a continuous conversation
- How to maintain conversation context
- How to handle errors
- How to protect your API key
- How to structure a chatbot project
- How to turn a simple chatbot into a web API
What Is an AI Chatbot?
An AI chatbot is a software application that allows users to communicate with an artificial intelligence system using natural language.
For example, a user might type:
What is Python?
The chatbot could respond:
Python is a popular programming language known for its simple syntax and wide range of applications, including web development, automation, data science, and artificial intelligence.
Unlike traditional rule-based chatbots, modern AI chatbots can generate responses dynamically.
They do not always require developers to manually define every possible question and answer.
Traditional Chatbot vs AI Chatbot
Traditional chatbots usually rely on predefined rules.
For example:
User: Hello

Rule:
If message == "Hello"

Response:
"Hi! How can I help you?"
This works for predictable conversations but becomes difficult to maintain when users ask questions in many different ways.
An AI chatbot uses an LLM.
For example:
User:
Can you explain Python?

User:
What exactly is Python?

User:
Tell me about Python programming.

User:
Why do people use Python?
An LLM can understand that all of these questions relate to Python and generate appropriate responses.
How Does an AI Chatbot Work?
A basic AI chatbot follows this workflow:
User
 ↓
Types a message
 ↓
Python application
 ↓
LLM API
 ↓
AI model processes the message
 ↓
Generated response
 ↓
Python application
 ↓
Response displayed to user
For example:
User:
What is machine learning?

        ↓

Python sends the message to an LLM

        ↓

LLM generates an answer

        ↓

Python displays the answer
The chatbot itself usually does not contain the entire AI model.
Instead, your Python application communicates with an LLM through an API.
What Do You Need to Build an AI Chatbot?
For this tutorial, you need:
- Python
- A code editor
- An LLM provider
- An API key
- Basic Python knowledge
- Internet access
You should understand simple Python concepts such as:
variables
functions
loops
if statements
imports
lists
You do not need advanced machine learning knowledge.
Technology Used in This Tutorial
We will use:
Python
OpenAI Python SDK
LLM API
python-dotenv
The chatbot architecture will look like:
User
 ↓
Python chatbot
 ↓
OpenAI API
 ↓
LLM
 ↓
AI response
The current official OpenAI Python SDK supports Python 3.10 or newer and uses client.responses.create() as the primary interface for generating responses.
Step 1: Check Python Installation
Open your terminal and run:
python --version
On some systems:
python3 --version
You should see something similar to:
Python 3.12.5
If Python is not installed, download and install a recent Python 3 version.
Step 2: Create a Chatbot Project
Create a project folder:
mkdir python_ai_chatbot
Move inside it:
cd python_ai_chatbot
Create your Python file:
touch chatbot.py
Your project will initially look like:
python_ai_chatbot/
│
└── chatbot.py
Step 3: Create a Virtual Environment
A virtual environment keeps the dependencies for one Python project separate from other projects.
Create it using:
python -m venv venv
On macOS or Linux:
source venv/bin/activate
On Windows:
venv\Scripts\activate
Once activated, you can install the packages needed for your chatbot.
Step 4: Install the Required Packages
Install the OpenAI Python package:
pip install openai
Also install python-dotenv:
pip install python-dotenv
You can install both together:
pip install openai python-dotenv
The official OpenAI SDK can be installed directly from PyPI using pip install openai.
Step 5: Get an API Key
To communicate with an LLM provider, your application needs authentication.
An API key is commonly used for this.
The key should remain private.
Never expose your real API key in:
GitHub repositories
Frontend JavaScript
Mobile application code
Screenshots
Blog posts
Public source code
Instead of writing this:
api_key = "your-secret-key"
store your key in an environment variable.
Step 6: Create a .env File
Inside your project folder, create:
.env
Add:
OPENAI_API_KEY=your_api_key_here
Now create:
.gitignore
Add:
.env
venv/
Your project now looks like:
python_ai_chatbot/
│
├── .env
├── .gitignore
├── chatbot.py
└── venv/
This helps prevent your API key from accidentally being committed to Git.
Step 7: Create the OpenAI Client
Open chatbot.py.
Add:
from dotenv import load_dotenv
from openai import OpenAI

load_dotenv()

client = OpenAI()
The SDK automatically reads OPENAI_API_KEY from the environment when the client is created this way.
Step 8: Send Your First Message to the AI
Let’s test whether the connection works.
Add:
from dotenv import load_dotenv
from openai import OpenAI

load_dotenv()

client = OpenAI()

response = client.responses.create(
    model="gpt-5.5",
    input="Hello! What is Python?"
)

print(response.output_text)
Run:
python chatbot.py
You should receive an AI-generated answer.
The important part is:
client.responses.create()
This sends the request.
The generated text can be accessed through:
response.output_text
The current SDK documentation shows this Responses API pattern for Python applications.
Step 9: Accept User Input
A chatbot needs to accept questions dynamically.
Instead of writing a fixed prompt, use Python’s input() function.
from dotenv import load_dotenv
from openai import OpenAI

load_dotenv()

client = OpenAI()

user_message = input("You: ")

response = client.responses.create(
    model="gpt-5.5",
    input=user_message
)

print("AI:", response.output_text)
Now run:
python chatbot.py
Example:
You: What is Flutter?

AI: Flutter is an open-source UI framework used to build applications for multiple platforms from a single codebase.
You have now built a very basic AI chatbot.
However, the program stops after one question.
Let’s improve it.
Step 10: Create a Continuous Chat Loop
Use a while loop so users can continue asking questions.
from dotenv import load_dotenv
from openai import OpenAI

load_dotenv()

client = OpenAI()

print("AI Chatbot")
print("Type 'exit' to stop.\n")

while True:

    user_message = input("You: ")

    if user_message.lower() == "exit":
        print("AI: Goodbye!")
        break

    response = client.responses.create(
        model="gpt-5.5",
        input=user_message
    )

    print("AI:", response.output_text)
Now the chatbot continues until the user types:
exit
Example conversation:
AI Chatbot
Type 'exit' to stop.

You: What is Python?

AI: Python is a high-level programming language known for its simple syntax.

You: What can I build using Python?

AI: You can build websites, automation tools, APIs, AI applications, data-analysis systems, and much more.

You: exit

AI: Goodbye!
The Problem with This Chatbot
There is one important limitation.
Each message is currently sent independently.
Consider:
You:
Who created Python?

AI:
Python was created by Guido van Rossum.

You:
When did he create it?
If previous context is not included, the model may not know exactly who he refers to.
Real chatbots need conversation context.
What Is Conversation Context?
Conversation context means giving the AI information from earlier messages.
For example:
User:
What is Django?

Assistant:
Django is a Python web framework.

User:
Is it good for APIs?
The second question only makes complete sense when the AI remembers the previous conversation.
A chatbot therefore needs some way to preserve relevant conversation history.
Step 11: Store Conversation History
One simple method is to maintain a list.
Start with:
conversation = []
Whenever the user sends a message:
conversation.append({
    "role": "user",
    "content": user_message
})
After receiving the AI answer:
conversation.append({
    "role": "assistant",
    "content": ai_message
})
This creates a history like:
[
    {
        "role": "user",
        "content": "What is Python?"
    },
    {
        "role": "assistant",
        "content": "Python is a programming language."
    },
    {
        "role": "user",
        "content": "Who created it?"
    }
]
The model can then use that history as context.
Step 12: Build a Chatbot with Conversation History
Here is a simple implementation:
from dotenv import load_dotenv
from openai import OpenAI

load_dotenv()

client = OpenAI()

conversation = []

print("AI Chatbot")
print("Type 'exit' to stop.\n")

while True:

    user_message = input("You: ")

    if user_message.lower() == "exit":
        print("AI: Goodbye!")
        break

    conversation.append({
        "role": "user",
        "content": user_message
    })

    response = client.responses.create(
        model="gpt-5.5",
        input=conversation
    )

    ai_message = response.output_text

    print("AI:", ai_message)

    conversation.append({
        "role": "assistant",
        "content": ai_message
    })
Now previous messages remain available as context.
Better Conversation Handling with Responses
Modern LLM APIs can also provide provider-managed conversation mechanisms rather than requiring your application to repeatedly send the entire history.
The current OpenAI Responses API supports associating responses with conversations, and conversation items can be added automatically as responses are generated.
For beginners, manually understanding conversation history first is useful because it teaches how chatbot context works.
Step 13: Add Chatbot Instructions
A chatbot usually needs a defined personality, role, or behavior.
For example:
response = client.responses.create(
    model="gpt-5.5",
    instructions="""
    You are a friendly Python programming tutor.

    Rules:
    - Explain concepts in simple English.
    - Assume the user is a beginner.
    - Give short examples when useful.
    - Stay focused on programming.
    """,
    input=user_message
)
These instructions help control how the chatbot responds.
Why Chatbot Instructions Matter
Imagine building different chatbots.
Python Tutor
Explain programming concepts to beginners.
Customer Support Bot
Answer questions about our products and policies.
Study Assistant
Teach concepts step by step without immediately giving homework answers.
Travel Assistant
Help users compare destinations and create travel plans.
The underlying LLM might be the same, but different instructions create different chatbot behavior.
Step 14: Create a Reusable Chat Function
Instead of putting everything inside the loop, create a function.
def get_ai_response(message):

    response = client.responses.create(
        model="gpt-5.5",
        instructions="""
        You are a helpful AI assistant.
        Answer clearly and concisely.
        """,
        input=message
    )

    return response.output_text
Then use:
answer = get_ai_response(user_message)
Complete example:
from dotenv import load_dotenv
from openai import OpenAI

load_dotenv()

client = OpenAI()


def get_ai_response(message):

    response = client.responses.create(
        model="gpt-5.5",
        instructions="""
        You are a helpful AI assistant.
        Explain things clearly.
        """,
        input=message
    )

    return response.output_text


while True:

    message = input("You: ")

    if message.lower() == "exit":
        print("AI: Goodbye!")
        break

    answer = get_ai_response(message)

    print("AI:", answer)
This is easier to maintain.
Step 15: Add Error Handling
API requests do not always succeed.
Possible problems include:
- Invalid API key
- Network failure
- Rate limits
- Incorrect request
- Unsupported model
- Server problem
Use try and except.
def get_ai_response(message):

    try:

        response = client.responses.create(
            model="gpt-5.5",
            input=message
        )

        return response.output_text

    except Exception as error:

        print("Error:", error)

        return "Sorry, something went wrong."
Now the entire chatbot does not necessarily crash if one request fails.
Handle Specific API Errors
The official Python SDK exposes specific exceptions including authentication, rate-limit, connection, bad-request, and server errors.
Example:
from openai import (
    OpenAI,
    AuthenticationError,
    RateLimitError,
    APIConnectionError
)
Then:
try:

    response = client.responses.create(
        model="gpt-5.5",
        input=message
    )

except AuthenticationError:

    print("Invalid API credentials.")

except RateLimitError:

    print("Too many requests. Try again later.")

except APIConnectionError:

    print("Unable to connect to the AI service.")
This is better than treating every problem exactly the same.
Step 16: Limit Empty Messages
Users might press Enter without entering anything.
Check for that:
if not user_message.strip():
    print("AI: Please enter a message.")
    continue
Example:
while True:

    user_message = input("You: ").strip()

    if not user_message:
        print("AI: Please enter a message.")
        continue

    if user_message.lower() == "exit":
        break
Step 17: Complete Beginner AI Chatbot
Here is a complete basic version:
from dotenv import load_dotenv
from openai import OpenAI
from openai import AuthenticationError, RateLimitError, APIConnectionError

load_dotenv()

client = OpenAI()

conversation = []

BOT_INSTRUCTIONS = """
You are a friendly AI assistant.

Rules:
- Give clear answers.
- Use simple language.
- Explain technical terms when needed.
- Keep responses relevant to the user's question.
"""

print("\nPython AI Chatbot")
print("Type 'exit' to stop.\n")


while True:

    user_message = input("You: ").strip()

    if not user_message:
        print("AI: Please enter a message.")
        continue

    if user_message.lower() == "exit":
        print("AI: Goodbye!")
        break

    conversation.append({
        "role": "user",
        "content": user_message
    })

    try:

        response = client.responses.create(
            model="gpt-5.5",
            instructions=BOT_INSTRUCTIONS,
            input=conversation
        )

        ai_message = response.output_text

        print("\nAI:", ai_message)
        print()

        conversation.append({
            "role": "assistant",
            "content": ai_message
        })

    except AuthenticationError:

        print("AI: API authentication failed.")

    except RateLimitError:

        print("AI: The API rate limit has been reached.")

    except APIConnectionError:

        print("AI: Unable to connect to the AI service.")

    except Exception as error:

        print("AI: Something went wrong.")
        print("Error:", error)
This gives you a functional command-line AI chatbot.
How Conversation Memory Affects Cost
There is an important issue with continuously sending chat history.
Imagine the conversation grows:
Message 1
Message 2
Message 3
Message 4
...
Message 100
If you repeatedly send all previous messages, the input becomes larger.
More context can mean:
- More tokens
- Higher API cost
- Longer processing times
- Eventually reaching context limits
For a real application, you should manage history carefully.
Limit Conversation History
One simple approach is to keep only recent messages.
For example:
MAX_MESSAGES = 10

if len(conversation) > MAX_MESSAGES:
    conversation = conversation[-MAX_MESSAGES:]
Now the chatbot only keeps the latest messages.
This is a simple technique for beginner projects.
More advanced systems may summarize older conversation history instead.
What Are Tokens?
LLMs process text as tokens.
Tokens are smaller units of text.
Your:
Prompt
Instructions
Conversation history
AI response
all consume tokens.
Token usage matters because it can affect:
API cost
Response speed
Context limits
Therefore, avoiding unnecessary conversation history is important.
Step 18: Add Streaming Responses
Most modern chatbots do not wait for the complete answer before displaying it.
Instead, they display text gradually.
This is called streaming.
The current OpenAI Python SDK supports streaming through server-sent response events.
A basic streaming request starts with:
stream = client.responses.create(
    model="gpt-5.5",
    input="Explain artificial intelligence.",
    stream=True
)

for event in stream:
    print(event)
In a complete interface, you would process text-delta events and append the generated text to the UI.
Streaming improves the user experience for longer responses.
Basic Chatbot Architecture
Your project currently looks like:
User
 ↓
Terminal
 ↓
chatbot.py
 ↓
OpenAI Python SDK
 ↓
LLM API
 ↓
Response
 ↓
Terminal
This works for learning.
But real applications usually have a user interface.
Build a Web Chatbot
You can turn the chatbot into a backend API using frameworks such as:
- Flask
- FastAPI
- Django
Your architecture then becomes:
Web / Mobile App
        ↓
Python Backend
        ↓
LLM API
        ↓
Python Backend
        ↓
User Interface
Build a Chatbot API with FastAPI
Install FastAPI:
pip install fastapi uvicorn
Create:
main.py
Then:
from fastapi import FastAPI
from pydantic import BaseModel
from openai import OpenAI

app = FastAPI()

client = OpenAI()


class ChatRequest(BaseModel):
    message: str


@app.post("/chat")
def chat(data: ChatRequest):

    response = client.responses.create(
        model="gpt-5.5",
        instructions="""
        You are a helpful AI assistant.
        """,
        input=data.message
    )

    return {
        "response": response.output_text
    }
Run:
uvicorn main:app --reload
Your backend now has an endpoint:
POST /chat
A frontend can send:
{
  "message": "What is Python?"
}
The backend returns:
{
  "response": "Python is a popular programming language..."
}
Recommended Production Architecture
For a real chatbot application, use an architecture like:
Flutter / React / Next.js
          ↓
      Your Backend
       FastAPI
          ↓
 Authentication
          ↓
 Chat Service
          ↓
    LLM Provider
          ↓
     AI Response
          ↓
      Your Backend
          ↓
       Frontend
Do not put your secret LLM API key directly inside a public frontend application.
Better Project Structure
As your project grows, separate your code.
For example:
ai_chatbot/
│
├── app/
│   ├── main.py
│   │
│   ├── services/
│   │   └── chatbot_service.py
│   │
│   ├── models/
│   │   └── chat.py
│   │
│   └── prompts/
│       └── system_prompt.py
│
├── .env
├── .gitignore
├── requirements.txt
└── README.md
This is cleaner than storing everything in a single file.
chatbot_service.py Example
from openai import OpenAI

client = OpenAI()


def generate_response(message: str) -> str:

    response = client.responses.create(
        model="gpt-5.5",
        instructions="""
        You are a helpful AI assistant.
        """,
        input=message
    )

    return response.output_text
Then your API can simply call:
generate_response(message)
Store Dependencies
Generate a dependency file:
pip freeze > requirements.txt
You might have packages such as:
openai
python-dotenv
fastapi
uvicorn
Another developer can then install them using:
pip install -r requirements.txt
Should You Save Chat History in a Database?
For a basic chatbot, keeping messages in Python memory may be enough.
For a real application, you usually need persistent storage.
Possible databases include:
- PostgreSQL
- MySQL
- MongoDB
- SQLite
- Supabase
- Firebase Firestore
You could store data such as:
Users
Chats
Messages
Created time
Updated time
Conversation ID
Example message structure:
{
  "chat_id": "chat_123",
  "role": "user",
  "message": "What is machine learning?"
}
Another message:
{
  "chat_id": "chat_123",
  "role": "assistant",
  "message": "Machine learning is..."
}
This allows users to reopen old conversations.
Add User Authentication
A public chatbot may need authentication.
Common options include:
- Email and password
- Google login
- Apple login
- Firebase Authentication
- Supabase Auth
- OAuth
- JWT authentication
Then you can associate conversations with users.
Example:
User
 ↓
Login
 ↓
User ID
 ↓
Chat conversations
 ↓
Messages
Add Rate Limiting
LLM APIs cost money.
If you allow unlimited requests, users could generate thousands of requests.
You may therefore want limits such as:
Free User:
20 messages per day

Premium User:
500 messages per day
You can also limit:
Requests per minute
Tokens per user
Maximum message size
Maximum response length
Rate limiting helps control cost and abuse.
Add Input Validation
Never blindly accept unlimited user input.
For example:
if len(message) > 5000:
    return {
        "error": "Message is too long."
    }
You should validate:
- Empty input
- Extremely long messages
- Unsupported file types
- Invalid request data
Add Moderation and Safety Controls
If your chatbot is public, think about how users may misuse it.
Depending on your application, you may need:
- Input moderation
- Output moderation
- Rate limits
- User reporting
- Logging
- Access controls
- Domain-specific restrictions
A customer-support chatbot, for example, may need to stay focused on support questions rather than behaving as an unrestricted general-purpose assistant.
Build a Specialized Chatbot
Your chatbot does not have to answer everything.
You could build a:
Programming Chatbot
You are a programming assistant specializing in Python.
Flutter Assistant
You are a Flutter development assistant.
Help users with Flutter, Dart, Firebase, APIs, and debugging.
Customer Support Assistant
Answer users using our support documentation.
Do not invent policies.
Educational Assistant
Explain topics to beginners using simple examples.
Business Assistant
Help users understand products, pricing, and company services.
The AI instructions determine much of the chatbot’s behavior.
Add Your Own Knowledge
A normal chatbot mostly relies on the model’s existing knowledge and whatever information you provide in the prompt.
But suppose you want a chatbot that answers questions about:
Your company
Your products
Your documentation
Your PDFs
Your policies
Your website
You can use Retrieval-Augmented Generation, commonly called RAG.
The architecture becomes:
User Question
      ↓
Search your knowledge base
      ↓
Find relevant information
      ↓
Send information + question to LLM
      ↓
Generate grounded answer
This allows you to build chatbots around your own data.
What Is RAG?
RAG stands for:
Retrieval-Augmented Generation
Instead of sending only:
User question
your system retrieves relevant information first.
For example:
Question:
What is your refund policy?

Retrieved document:
Customers can request refunds within 14 days...

LLM:
Generates an answer using that information.
RAG is commonly used for:
- Document chatbots
- Company knowledge assistants
- PDF chatbots
- Customer-support bots
- Internal AI assistants
Add Tools to Your Chatbot
Advanced chatbots can do more than generate text.
They can call tools or functions.
For example:
User:
What's the status of order 123?

Chatbot
 ↓
Calls your order API
 ↓
Receives order status
 ↓
Explains it to user
Modern Responses APIs can call custom functions and built-in tools, allowing a model to use external systems as part of generating an answer.
Possible chatbot tools include:
- Database queries
- Weather APIs
- Search systems
- Order tracking
- Booking systems
- Email systems
- Calendar systems
Simple Chatbot vs Advanced Chatbot
A basic chatbot looks like:
User
 ↓
LLM
 ↓
Response
An advanced chatbot may look like:
User
 ↓
Authentication
 ↓
Conversation Manager
 ↓
Safety Checks
 ↓
RAG
 ↓
Tools / APIs
 ↓
LLM
 ↓
Response Validation
 ↓
Streaming
 ↓
User
Do not try to build everything at once.
Start with the simple version.
Common Beginner Mistakes
Exposing the API Key
Never put your API key directly in frontend code.
Sending Unlimited Chat History
Long conversation history can increase token usage and cost.
Ignoring Errors
API calls can fail, so use error handling.
Trusting Every AI Response
LLMs can generate incorrect information.
Important outputs may need verification.
Building Everything in One File
A single Python file is fine for learning but difficult to maintain in a larger project.
Separate services, routes, models, and configuration.
Allowing Unlimited Requests
Public chatbots should have appropriate rate limits.
Not Validating Input
Validate messages before sending them to your LLM provider.
How Much Does an AI Chatbot Cost?
The cost of an API-powered chatbot depends on factors such as:
- Model used
- Number of users
- Number of messages
- Input tokens
- Output tokens
- Conversation length
- Additional tools
- Database hosting
- Backend hosting
A small personal chatbot can have relatively low usage.
A chatbot serving thousands of users needs proper cost monitoring.
How to Reduce Chatbot API Costs
You can reduce costs by:
- Selecting an appropriate model for each task
- Limiting unnecessary output
- Avoiding huge prompts
- Limiting conversation history
- Summarizing old messages
- Caching repeated responses
- Retrieving only relevant documents
- Setting user quotas
Do not automatically send your entire database or conversation history with every request.
AI Chatbot Development Roadmap
A beginner-friendly learning path is:
Learn Python Basics
       ↓
Understand APIs
       ↓
Learn LLM Basics
       ↓
Use an LLM API
       ↓
Build CLI Chatbot
       ↓
Add Conversation Context
       ↓
Build FastAPI Backend
       ↓
Add Database
       ↓
Add Authentication
       ↓
Add Streaming
       ↓
Learn Embeddings
       ↓
Learn Vector Databases
       ↓
Learn RAG
       ↓
Learn Tool Calling
       ↓
Build Production AI Chatbot
You do not need to learn everything before starting.
Building a basic chatbot first is one of the best ways to understand how LLM applications work.
Beginner Project Ideas
After building the basic chatbot, try creating:
- Python learning chatbot
- Coding assistant
- Interview preparation bot
- Study assistant
- Customer-support chatbot
- FAQ chatbot
- PDF chatbot
- Resume assistant
- Travel assistant
- Product recommendation assistant
- Documentation chatbot
- Flutter development assistant
Each project teaches slightly different skills.
Frequently Asked Questions
Can I build an AI chatbot using Python?
Yes. Python is one of the most popular languages for building AI applications and connecting to LLM APIs.
Do I need machine learning knowledge?
No. You can build an API-based chatbot without training your own machine-learning model.
Do I need an API key?
Most commercial hosted LLM providers require authentication such as an API key.
Can my chatbot remember previous messages?
Yes. You can store conversation history yourself or use conversation-management features provided by your LLM platform.
Can I connect a Python chatbot to Flutter?
Yes.
A common architecture is:
Flutter App
    ↓
Python FastAPI Backend
    ↓
LLM API
Can I build a website chatbot?
Yes. Your frontend can communicate with a Python backend through an API.
Can I build a chatbot using my own PDFs?
Yes. A common solution is to use RAG, embeddings, and a retrieval system to provide relevant document content to the model.
Should I put my LLM API key in a Flutter or React app?
No. Keep secret credentials on a trusted backend.
Can an AI chatbot call other APIs?
Yes. Modern LLM platforms can support function or tool calling, which allows the model to request actions through your own code.
Is an AI chatbot the same as ChatGPT?
No. ChatGPT is a complete AI product. An AI chatbot is a broader type of application that developers can build using LLMs and APIs.
Final Thoughts
Building an AI chatbot with Python is one of the best beginner projects for learning practical AI development.
At the most basic level, the process is simple:
User sends message
        ↓
Python receives message
        ↓
Python sends message to LLM API
        ↓
LLM generates response
        ↓
Python receives response
        ↓
Chatbot displays response
You can begin with only a few lines of Python.
Then gradually add:
Conversation history
Streaming
Error handling
FastAPI
Database storage
Authentication
Rate limiting
RAG
Vector databases
Tool calling
Custom knowledge
The important thing is to start with the basic interaction between Python, the user, and an LLM API.
Once you understand that core workflow, you can build increasingly powerful chatbots for websites, mobile applications, customer support, education, business tools, and many other AI-powered products.